Biologic Specimen Collection
Birth Defects Study to Evaluate Pregnancy exposureS (BD-STEPS)
AttR_SalivaInstructionsChild_Nov5
Biologic Specimen Collection
OMB: 0920-0010

H ow
to Collect a Saliva (Spit) Sample from Your Child

Thank you for agreeing to provide a saliva sample. To collect the sample, we have included:
Consent forms (one copy to sign and return to us; one copy for you to keep)
Instructions and tips for collecting a saliva sample from your child (the back of this sheet)
Frequently asked questions about saliva collection
Collection container in a clear case (includes an empty base and a liquid-filled cap)
Packet that holds a pair of blunt tip scissors and 5 small sponges on plastic handles
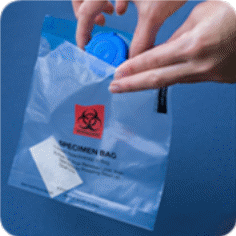
Plastic bag with a small square of absorbent cloth
Postage-paid mailing envelope (one for all collection containers)
Please read the following directions BEFORE you start collecting a saliva sample from your child.
1
Write the date the sample was collected on the bag label.


2Write the date the sample was collected on the bag label.
Wait at least 30 minutes after your child has eaten or been breast or bottle fed before collecting a saliva sample.


3Write the date the sample was collected on the bag label.
Remove the scissors and plastic bag with 5 sponges from the packet. Open the plastic bag at the end away from the sponge tips. When handling the sponges, hold them by the plastic handles. Do NOT touch the white sponge tips. Check sponges for any damage. Make sure your child is not too close to the scissors and do NOT leave your child alone. The plastic bag is a choking hazard.


4Write the date the sample was collected on the bag label.
Remove the clear base from the clear case. Place the base on a flat surface next to the scissors and sponges. Do NOT screw on the cap at this step. Do NOT remove the plastic film from the cap.


5Write the date the sample was collected on the bag label.
YES
G ently
place a sponge inside your child’s mouth between the gum and
cheek. Rub it up and down between the gum and cheek on both sides of
the mouth for about 20 seconds.
6Write
the date the sample was collected on the bag label.

behind the plastic tabs inside the empty base. Cut at the thin part
of the handle just above the sponge tip with the scissors.
7Write
the date the sample was collected on the bag label.


X
Carefully place the liquid-filled cap on top of the base that holds the
8Write
the date the sample was collected on the bag label.

release the liquid. The collection container must be closed within 30
minutes of collecting saliva using the first sponge tip.
If you cannot collect saliva using all 5 sponges, see Tip #4 on the back
of this page for instructions.


9Write
the date the sample was collected on the bag label.

upside down and back again 5 times to mix the liquids.

10W
![]() rite
the date the sample was collected on the bag label.
rite
the date the sample was collected on the bag label.
closed collection container into the plastic bag with the absorbent


11Write the date the sample was collected on the bag label.
Place the signed consent form and the plastic bag with the collection container into the postage-paid mailing envelope. If 1 or both parents collected saliva, place their plastic bag(s) with collection container(s) into the same mailing envelope. Close the envelope and return it to us by U.S. mail as soon as possible.

If you have any questions or problems, please call 888-743-7324.
Thank you!
Tips for Collecting Saliva from
Thank
you again for participating in this important study of birth
defects!


To provide the highest quality sample, please try to follow the tips below:
Wait 30 minutes after breast feeding or bottle feeding your child before beginning collection of the saliva sample. If you wait a shorter time (less than 30 minutes), you can still mail us your child’s sample.
Select a clean, flat surface for laying out the contents of the collection kit.
If your child gets upset during the collection, other parents have found it helpful to watch a video or sing a song. If your child cannot be soothed, it is okay to stop the collection and start again later (see tip #4).
If you have closed the collection container and there are still more sponges, you must wait at least 30 minutes before re-opening the container. To use the rest of the sponges, re-open the container being careful not to spill any of its contents. You may collect saliva using more sponges over the next 24 hours by following steps 5 & 6 of the instructions on the front of this page. Remember to re-close the container each time you collect saliva from your child using more sponges. It will be best if you use all 5 sponges. But if this is not possible, you can mail us what you were able to collect.
It is best NOT to touch the sponge tips but if you or your child accidentally touches the sponge tip, it is okay to use it.
It is okay if the sponges do not stand up in the clear base after you cut them off. The placement of the sponges as shown in the picture on the instructions (step #6) is to make cutting them easier. Once the sponge tips are separated from the blue handle, they can lie anywhere in the base.
The base of the collection kit holds the saliva, and it is important that the saliva does not leak. Screw the cap onto the base tightly so that the threads do not show (see picture below):

Warnings:
Do NOT ingest the liquid in the cap. Wash with water if the liquid in the cap comes in contact with your child’s eyes or skin. See Material Safety Data Sheet (MSDS) for OGR-500 / OGR-250 at www.dnagenotek.com/US/pdf/PD-SVSDS-00004-PD-MSDS-00004.pdf for more information.
The plastic bag containing sponges is a choking hazard.
Caution should be used when inserting sponges into your child’s mouth.
Do NOT leave your child unattended during the collection.
| File Type | application/vnd.openxmlformats-officedocument.wordprocessingml.document |
| Author | CTM |
| File Modified | 0000-00-00 |
| File Created | 2021-01-28 |
© 2026 OMB.report | Privacy Policy