Generic Clearance for Geographic Partnership Programs
Generic Clearance for Geographic Partnership Programs
Community TIGER User Guide_9_11_2015
Generic Clearance for Geographic Partnership Programs
OMB: 0607-0795
Community TIGER User Guide 2015
Instructions for Participants Using Amazon WorkSpace Software
2015 xxx….Geospatial Program
September 2015
Version 1.0

U.S. Department of Commerce
Economics and Statistics Administration
U.S. CENSUS BUREAU
census.gov
Contents
1.1 Install Amazon WorkSpaces 4
1.2 Register and Access Amazon WorkSpaces 4
1.3 Transfer Data to Amazon WorkSpaces 5
3 Contribution Management System 16
Appendix A: Acronyms 20
Introduction
The Community TIGER tool has been developed to support the process of creating, maintaining, and managing the address and geospatial data for your area. It will also streamline the way in which this data will be exchanged between you and the Census Bureau in preparation for the 2020 Census. The tool consists of three parts; web-based address and spatial data exchange functions; a partner toolbox; and a contribution management system.
Community TIGER is a collaborative project with ESRI. Utilizing cloud technology, the tool provides free access to ESRI ArcGIS, with added Community TIGER extensions, and the partner toolbox add-in preinstalled on a virtual desktop. The system is accessible through the Amazon WorkSpace that includes a free thin client download. Once registered, the Census Bureau will provide you with registration code and login information. An additional benefit is that the Community TIGER partner toolbox add-in is also available for installation on each government’s local environment for those that have ArcGIS with the required extensions.
Respondent Burden
The Census Bureau estimates that it will take on average 40 hours to complete the Community TIGER review depending on the number of addresses and rate of address growth and change. This includes the time needed to read the invitation materials and complete the registration forms, and upon receipt of the Community TIGER materials, to read the instructions, assemble and review the Community TIGER materials, and provide updates.
Please send comments regarding this burden estimate or any other aspect of this collection of information, including suggestions for reducing this burden to:
Paperwork Project 0607-0795
4600 Silver Hill Road, Room 3K138
Washington, DC 20233.
Alternatively, you may e-mail comments to [email protected]; use "Paperwork Project 0607-0795" as the subject. Please include a copy of your message addressed to [email protected].
Under the paperwork Reduction Act, the Census Bureau cannot ask you to respond to a collection of information unless it displays a currently valid Office of Management and Budget (OMB) control number. The OMB number is found in the upper right corner of each Community TIGER form.
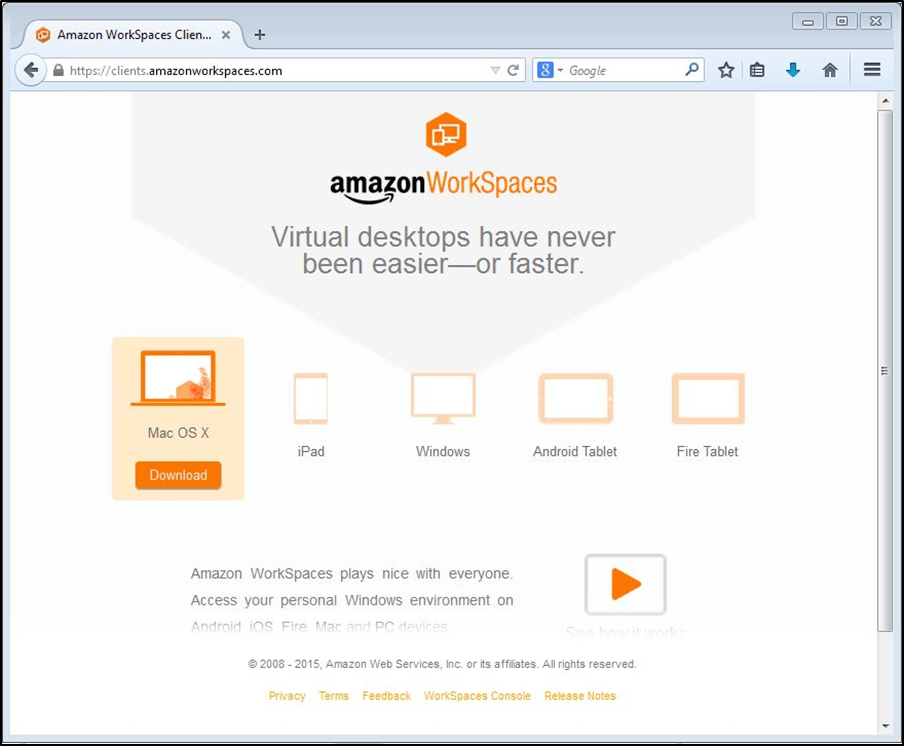
Navigate to https://clients.amazonworkspaces.com/
Download and install Amazon thin client software that corresponds to your device. Client applications are available for the following platforms and devices:
Microsoft Windows 7 and later;
Apple Mac OS X 10.8.1 and later;
Apple iPad 2 with iOS 7.0 and later;
Apple iPad Retina with iOS 7.0 and later;
Amazon Kindle Fire HDX and Kindle HD 7;
Samsung and Nexus tablets with Android OS 4.2 and later.
|
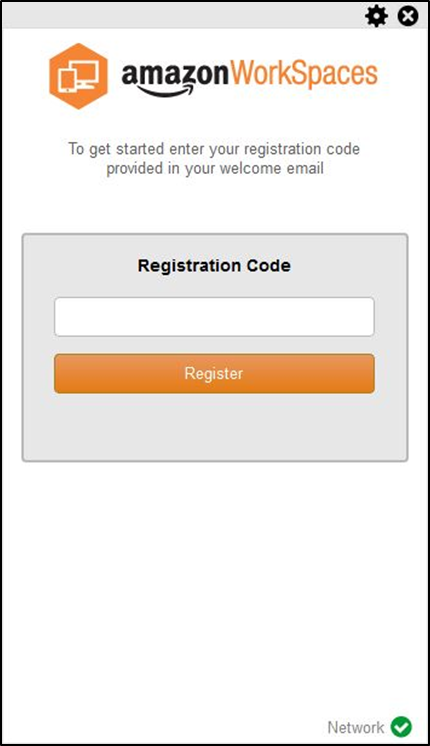
Open Amazon WorkSpaces and when prompted enter registration code provided by the Census Bureau.
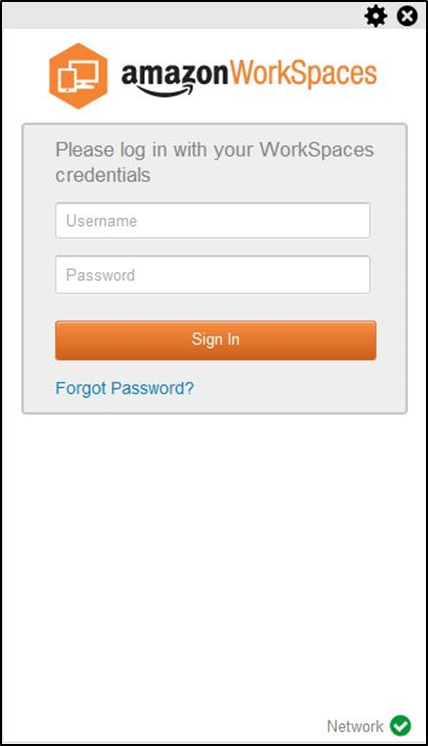
Log in with the username and password provided by the Census Bureau.
Register Amazon WorkSpaces Access Amazon WorkSpaces
|
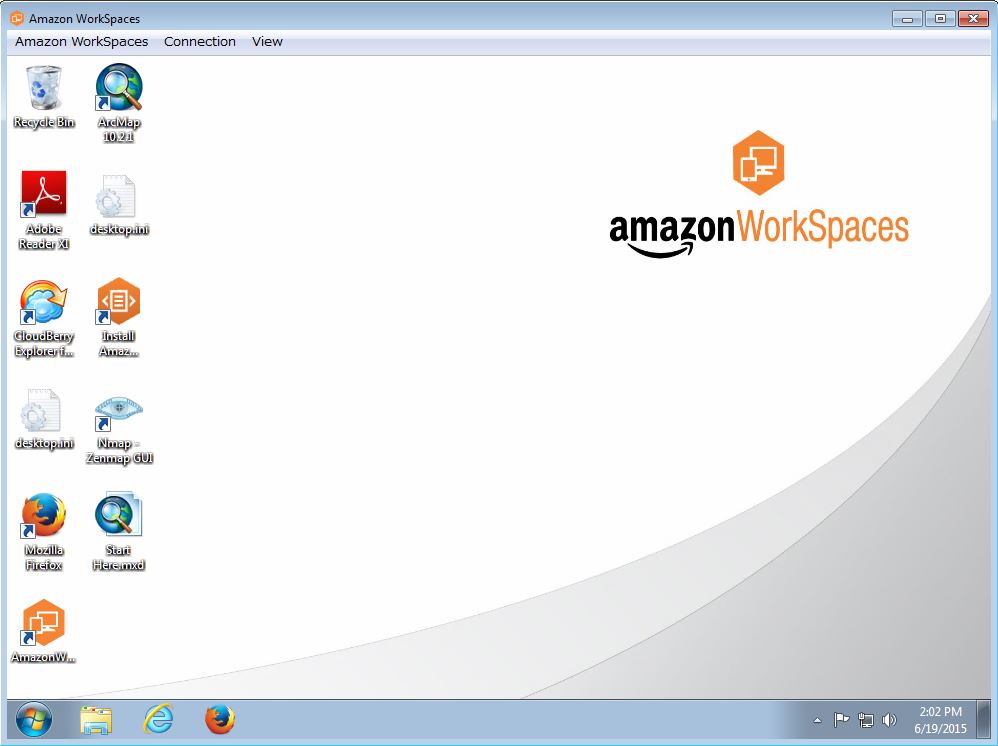
Using a file transfer application, transfer data from where it is stored locally to the Amazon WorkSpace.
NOTE: CloudBerry Explorer for Amazon S3 is preinstalled
Double-click the “Start Here.mxd”.
|
Click the “Community TIGER Data Preparation Tool” located in the toolbar.


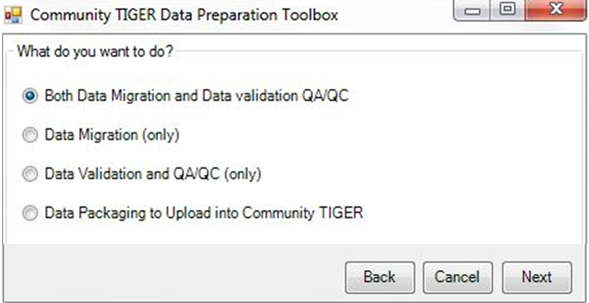
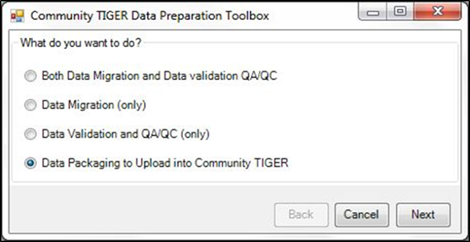
If you are just beginning, select “Both Data Migration and Data Validation QA/QC” and click “Next”. If your data has already been migrated, select one of the other choices.
|
Data Migration/Validation Descriptions |
||
a |
Data Migration and Data Validation QA/QC |
Good starting point, most used. |
b |
Data Migration (only) |
Used usually if one has a limited amount of time, more information will be added later. |
c |
Data Validation and QA/QC (only) |
Option of inputting partial information on time constraint, then returning to input other (i.e., Data Migration) information when time allows. |
d |
Data Packaging to Upload into Community TIGER |
Final step. |
Select the type of contribution for the available options and click “Next”.
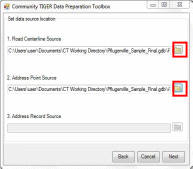


 Click
the folder icon to set the data source location for each type of
contribution selected previously and click “Next” when
all data source locations are set.
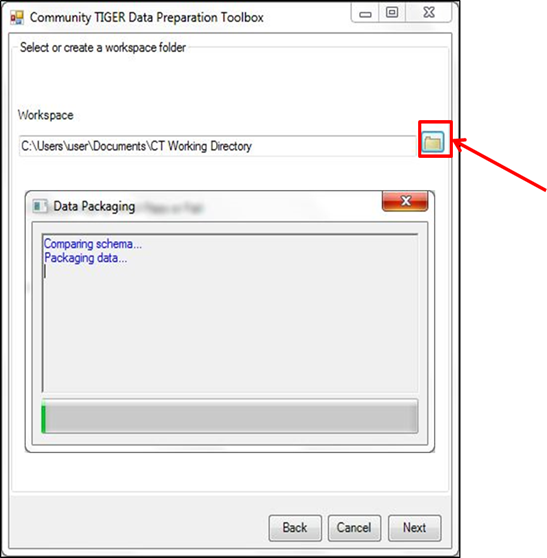
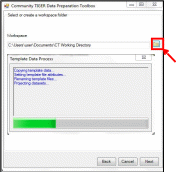
Click the folder icon to select a workspace already created or to create a new workspace. Click “Next” when the workspace location is set. This will setup your workspace folder with the required template data with correct attributes as well as projecting datasets.
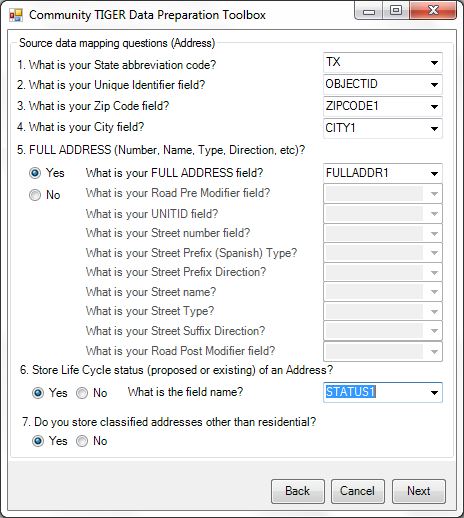
Select fields from data that correspond to fields in the local government data model from dropdown menus (field names that match local government data model field names are automatically mapped). Select “Next” when all mandatory data is mapped.
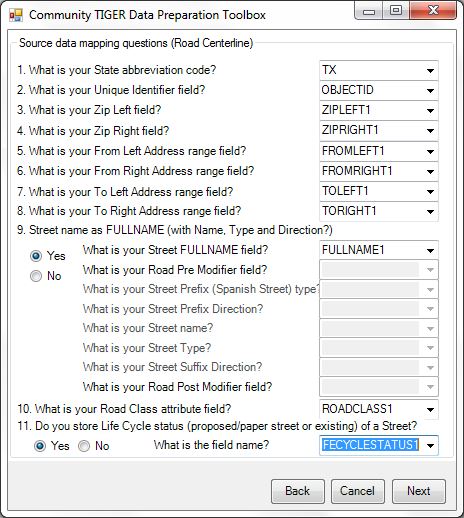
Repeat step 1 for each contribution type.
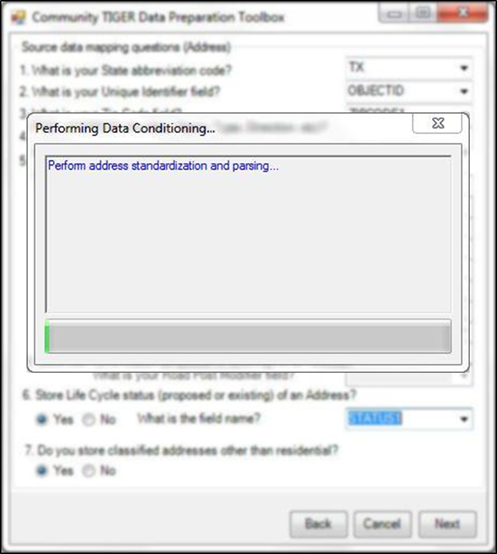
Once all the mandatory data is mapped for your data sources, the tool runs data conditioning edits. These edits perform any standardization and parsing required as well as automated data clean up.
|
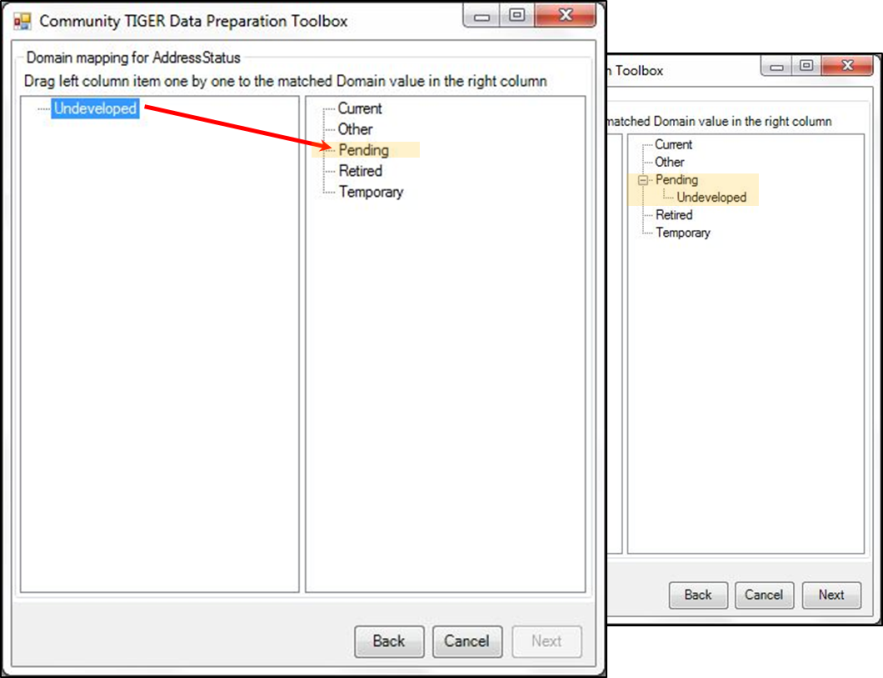
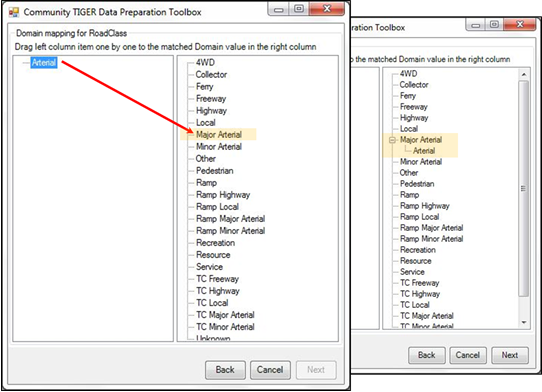
If prompted, map domain values by dragging value(s) from the left column to the existing domain value it best relates to in the right column. Click “Next” when all domain values are mapped.
|
Repeat step 3 for every value from each domain with unmapped values.
O
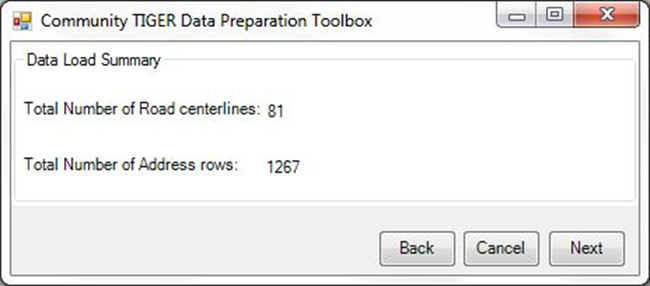 nce
data mapping is complete, the “Data Load Summary” window
displays the number of features migrated for each data source
contribution, click “Next.”
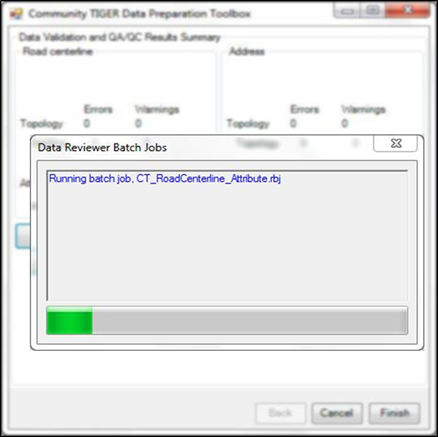
At this point, the tool is running data validation edits on the migrated data. The data validation edits check your data, to ensure it meets Census Bureau standards and creates an error log for your review.
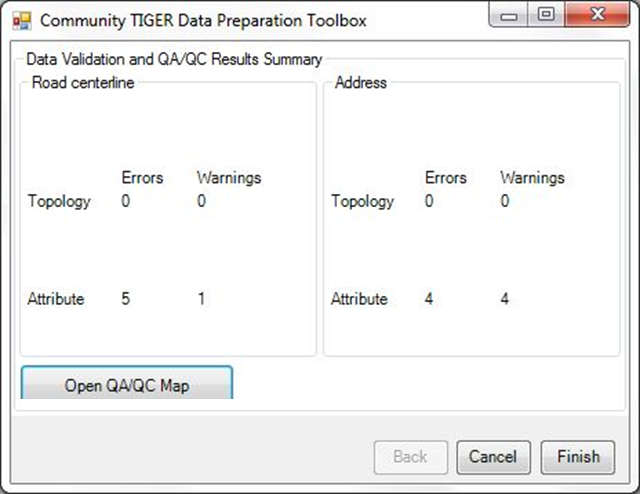
The “Data Reviewer Batch Jobs” window displays number of errors and warnings for both topology and attributes identified within each data source contribution. Click “Open the QA/QC Map” to view a map of the errors and warnings, or click “Finish” to move onto data packaging.
|
|
The QA/QC map displays the results of data validation. Address points and road centerlines are classified by “Severity” either “No error/warning” (grey), “Error” (red), or “Warning” (yellow/orange depending on your display).
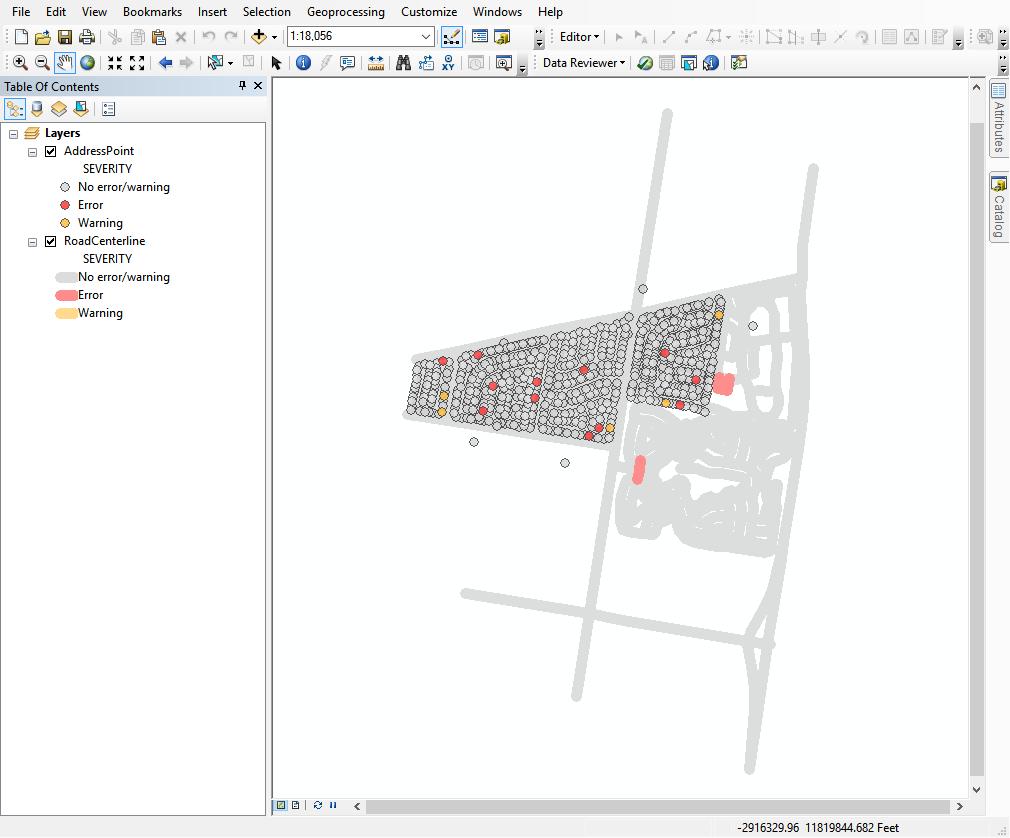
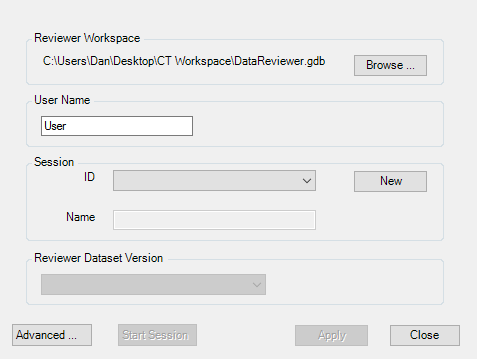
Click the “Reviewer Session Manager” located in the toolbar and click “Browser” to select the Data Reviewer.gbd file located within the workspace created earlier. Click “Add”.


Select the latest session (highest number) from the “ID” dropdown menu within the “Session” box. Click “Start Session”, and then click “Close”.
|
Click “Reviewer Table” located in the toolbar.
Select column headers and drag to the grey area above the column headers to group the reviewer data (Suggested groupings are by “ORIGINTABLE,” then “SEVERITY,” then “CHECKTITLE”).
Select “Start Editing” from the “Editor” dropdown menu on the toolbar.
|
Select a record by double-clicking the record (this highlights the record on the map and displays the record’s attributes in the “Attributes” window) within the reviewer table and make any necessary edits within the “Attribute” window.
Repeat step 6 as needed.
When finished making edits, select “Save Edits” from the “Editor” dropdown menu on the toolbar then “Stop Editing” from the “Editor” dropdown menu on the toolbar.
Click the “Community TIGER Data Preparation Tool” located in the toolbar and select “Data Validation and QA/QC (only)” to repeat data clean up as needed.


Click the “Community TIGER Data Preparation Tool” located in the toolbar. Select “Data Packaging to Upload into Community TIGER,” and click “Next” if you are satisfied with your submission. You also have the option to run “Data Validation and QA/QC” again to continue making corrections to your data.
|
Click the folder icon to select the workspace created earlier and click “Next” when the workspace location is set.
|
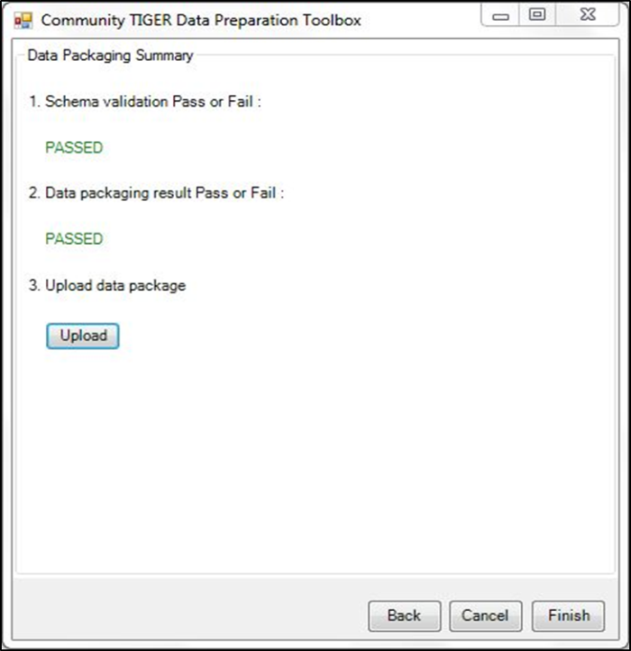
Once the schema validation and data packaging have both passed, click “Upload” to log into the Community TIGER Contribution Management System (CMS) and upload the packaged data.
|
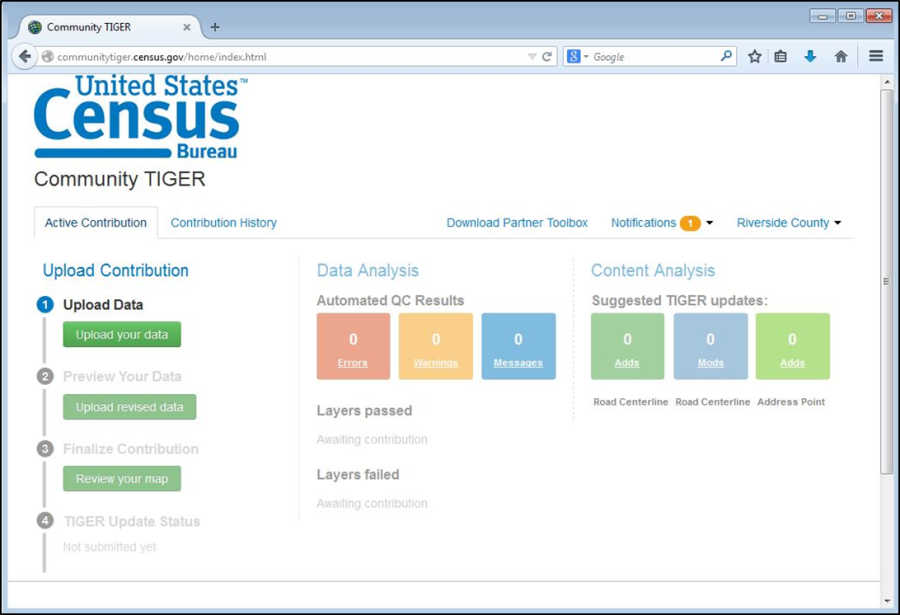
Navigate to http://communitytiger.census.gov and login with the username and password previously provided by Census Bureau.
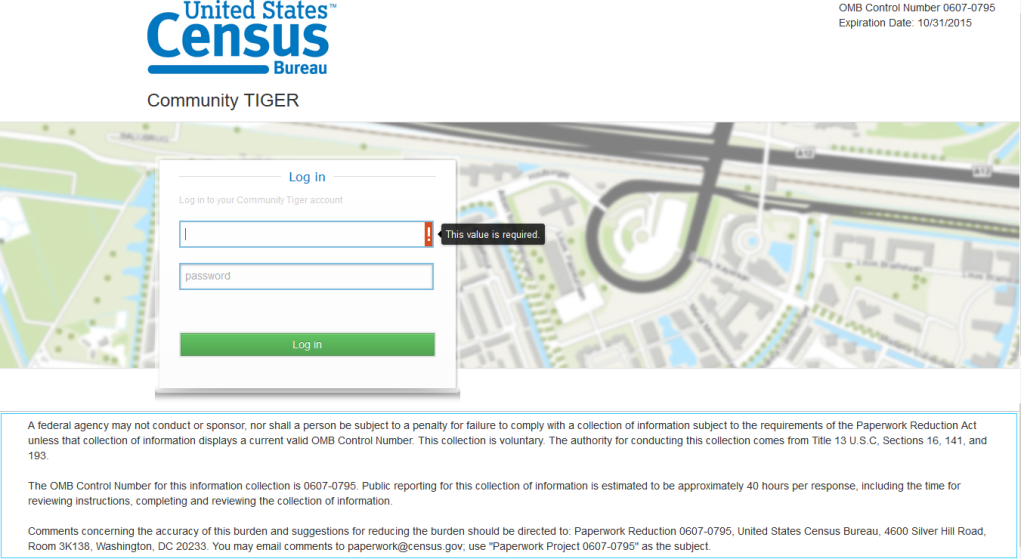
Click “Upload Data” to bring up the “Upload Data” window. Click “Browse...” to select your packaged data (a .zip file with the filename “CTPackage_<datetimestamp>” located within the workspace created earlier), once selected, click “Open” once selected.
Click “Upload Now” bringing up a status bar showing the progress of the file upload. When completed click “OK” to return to the CMS “Active Contribution” page.
When the data processing is complete, the system will send you an email alert that the data is ready for review.
|
Navigate to http://communitytiger.census.gov and login with username and password provided by Census Bureau.
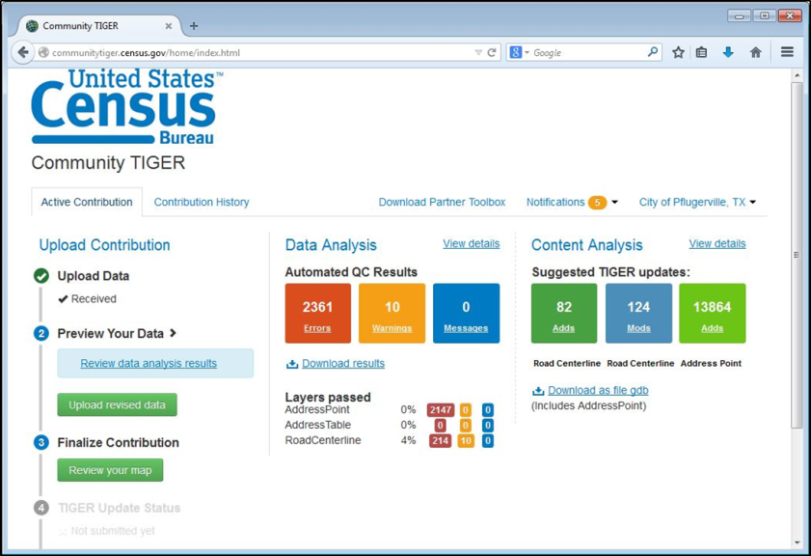
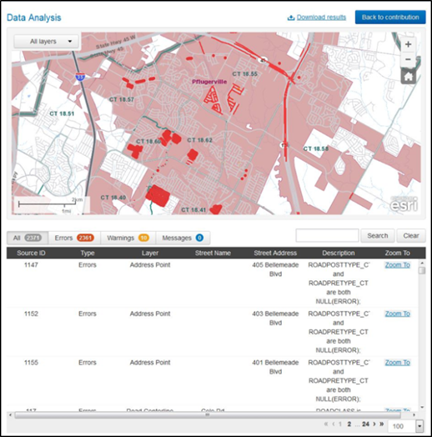
Click either “Review Data Analysis Results” or “View Details” to the right of “Data Analysis” in the middle column to bring up the “Data Analysis” map and table.
|
From here you can navigate the map, turn layers on/off using the “All layers” dropdown menu, and filter, sort, search and “Zoom To” records.
Click “Download results” to bring up the “Download results” window. Click “Download Results” to save a .zip file of the data analysis records. Users may also get the same results from the CMS “Active Contribution” page.
Click “Back to contribution” to return to the CMS “Active Contribution” page.
Navigate to http://communitytiger.census.gov and login with the username and password previously provided by Census Bureau (if necessary).
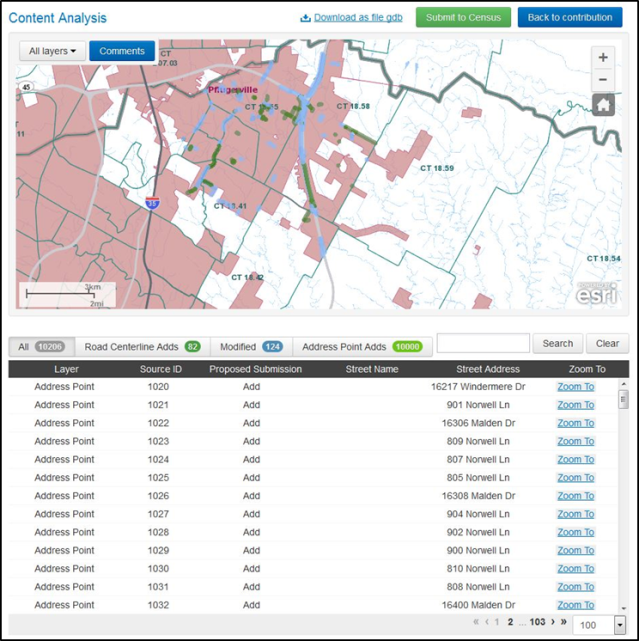
Click either “Review your map” or “View details” to the right of “Content Analysis” in the third column to bring up the “Content Analysis” map and table.
From here you can navigate the map, turn layers on/off using the “All layers” dropdown menu, and filter, sort, search and “Zoom To” records.
Click “Download results” to bring up the “Download results” window. Click “Download Results” to save a .zip file of the potential submission records. This can also be accomplished from the CMS “Active Contribution” page.
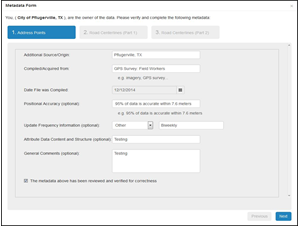
Click “Submit to Census” to bring up the “Metadata Form” window. Enter the required information and click “Next” to complete each back. Click “Finish” after required information on the final page is entered.
Click “Back to contribution” to return to the CMS “Active Contribution” page.
|
Navigate to http://communitytiger.census.gov and login with username and password provided by Census Bureau (if necessary).
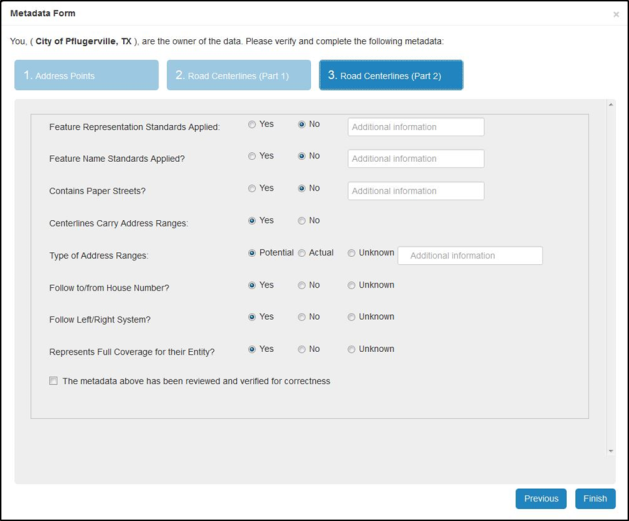
From either the “Active Contribution” page or the “Content Analysis” page click “Submit to Census” to bring up the “Metadata Form” window. Enter the required information and click “Next” to complete each back.
|
Once all the required information has been entered, click “Finish” after all required information on the final page has been entered. When the submission to Census Bureau is complete, an e-mail notification of the status is sent.
|
If you have questions, please contact the Census Bureau Community TIGER Team by e-mail at [email protected] or phone (888) 658-5580.
Acronym |
Description |
CMS |
CONTRIBUTION MANAGEMENT SYSTEM |
ESRI |
Environmental Systems Research Institute |
GIS |
geographic information system |
HDX |
High Definition User Experience |
iOS |
iPHONE OPERATION SYSTEM |
KINDLE HD |
Refers to two models of Amazon’s Kindle in High Definition (7" and 8.9") |
OMB |
OFFICE OF MANAGEMENT & BUDGET |
OS |
OPERATING SYSTEM |
QA/QC |
QUALITY ASSURANCE/QUALITY CONTROL |
TIGER |
Topologically Integrated Geographic Encoding and Referencing SYSTEM |
| File Type | application/vnd.openxmlformats-officedocument.wordprocessingml.document |
| File Modified | 0000-00-00 |
| File Created | 0000-00-00 |
© 2026 OMB.report | Privacy Policy
