Exhaled nitric oxide procedures
Understanding Long-term Respiratory Morbidity in Former Styrene-exposed Workers: Medical Survey
Attachment 4 Exhaled Nitric Oxide SOP
Exhaled nitric oxide procedures
OMB: 0920-1332
Attachment 4 Exhaled Nitric Oxide SOP
Form Approved OMB
NO. 0920-xxxx Expiration
Date: xx/xx/20xx
NIOSH/RHD
FeNo Station Instructions
Equipment Information
Ensure that there are no electronic devices (including mobile phone) near the NIOX MINO, as this may interfere with sampling.
Keep the unit away from windows, sunshine, or radiators to avoid unstable conditions.
Be in the habit of noting the number of tests remaining on the sensor and checking the expiration dates of the sensor, machine, and filters.
Setting Up (first day)
Make sure sensor is secure at the bottom of the unit:

Plug in the NIOX MINO.
Allow the NIOX MINO to warm up and stabilize
(up to 30 minutes, usually 5-10 minutes).
When the NIOX MINO is ready for use, the screen will show a smiling cloud with the time.
T
 ouch
the display screen. The NIOX MINO is ready for measurement when the
blue light on top is lit and the screen shows a blowing cloud.
Public
reporting burden of this collection of information is estimated to
average 5 mins per response, including the time for reviewing
instructions, searching existing data sources, gathering and
maintaining the data needed, and completing and reviewing the
collection of information. An agency may not conduct or sponsor, and
a person is not required to respond to a collection of information
unless it displays a currently valid OMB control number. Send
comments regarding this burden estimate or any other aspect of this
collection of information, including suggestions for reducing this
burden to CDC/ATSDR Information Collection Review Office, 1600
Clifton Road NE, MS D-74, Atlanta, Georgia 30333; ATTN: PRA
(0920-xxxx).
QC Checks (beginning of each shift)
At the beginning of each shift, perform an ambient NO check.
Attach a new patient filter to the unit. Press the mode button
 and then press the Ambient
 measurement button.
Wait for approximately 4 minutes (you will see a countdown on the display) and then record the value on the top of the log sheet.
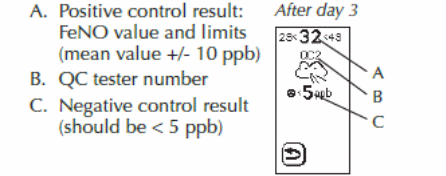
At the beginning of each shift, the tech will perform a calibration check on the machine they will be using.
Press the mode button and then press the QC
 button
S
 elect
your assigned QC tester number using the number pad.
Perform a normal FeNO test.
Remove the filter and immediately attach the red QC plug.
Press the forward icon
 on the display. Wait approximately 5 minutes for the analysis to
complete and the result to be displayed.

If either the positive or negative control fails have one of the other QC testers perform the QC test.
Subject Testing
Ask the worker the exclusion question on the back of their control card: “Do you have a breathing problem requiring oxygen or problems taking deep breaths?” If the answer is yes, thank them and tell them they do not need to complete this test.
Fill in the log sheet for the subject, including answering the questions and making a note of any medications, recent illnesses, and any nitrate rich foods eaten recently.
Review the exhaled NO procedure with the subject.
![]()
Enter the subject ID by selecting the ID button on the main screen:
Input the subject ID using the number buttons— this is on the control card
Select OK to accept the ID. You will now see the ID at the top of the main screen.
Ask the subject to place a clean filter into the port on the machine.
Have the subject sit in a chair facing the mirror. Make sure the screen is in Ready for Measurement Mode and you can see the Subject ID at the top of the screen
Empty lungs prior to beginning—do not place mouth on mouthpiece.


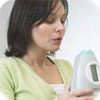
Place mouth on mouthpiece and create a tight seal. Inhale deeply through the filter to total lung capacity (i.e., breathe in and fill lungs completely). The cloud will inflate.


Exhale normally and evenly through the filter for 10 seconds, keeping the cloud in the middle of the screen. During exhalation, coach the participant and let them know if they should be breathing harder or softer to keep the cloud in the center. Also let them know when they are half way or almost done (use bar underneath the cloud as a guide) with their exhalation.


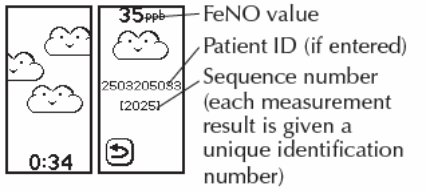
If the measurement is good, the screen will display a cloud scene and the timer will start counting down from one and a half minutes.

When the result is ready, the unit will “chime” and the reading will appear on the screen (in ppb).
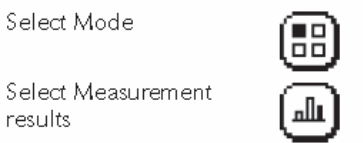
Record the measurement on the Log Sheet. The NIOX MINO will also store the data. To access the data, select the Mode and then Measurement:

![]()
Press the “Return” icon to go back to the main menu.
If the measurement is bad, the screen will display an error code (beginning with “E”). Please refer to manual to see list of error codes.
R
 ecord
the error code on the log sheet and explain to the subject what
they need to do differently on the next trial.
ecord
the error code on the log sheet and explain to the subject what
they need to do differently on the next trial.Press the “Return” icon to go back to the main menu.
Repeat the test up to 6 times until each subject records one good measurement.
Note:
Leave the unit plugged in at all times, otherwise you will have to wait for it to stabilize upon reconnection, which may take up to 30 minutes.
Script for coaching:
At this station, we are going to measure inflammation in your lungs. First, you will breathe out all the way, not using the machine. Then you will place you mouth on mouthpiece and create a tight seal. Take a full breath in through the machine. Then breathe out evenly through the filter until I tell you to stop (about 10 seconds). You will watch the screen in the mirror and you will see a cloud on the display. Try to keep the cloud in the middle of the shaded area. If the cloud is at the top of the screen you are blowing too hard and if the cloud is at the bottom of the screen you are not blowing hard enough. I will coach you through the procedure. Do you have any questions?
Breathe out as much as possible. Empty your lungs
Now put the mouthpiece in your mouth and take a deep breath in
And blow out steadily… keep going… keep going…
Stop.
| File Type | application/vnd.openxmlformats-officedocument.wordprocessingml.document |
| Author | WJA6 |
| File Modified | 0000-00-00 |
| File Created | 2021-01-13 |
© 2026 OMB.report | Privacy Policy