JOLTSPro Guide to BLS Web Reporting
QUICK GUIDE TO BLS WEB REPORTING.docx
Job Openings and Labor Turnover Survey (JOLTS)
JOLTSPro Guide to BLS Web Reporting
OMB: 1220-0170


QUICK GUIDE TO BLS WEB REPORTING
Job Openings and Labor Turnover Survey
https://idcf.bls.gov/authentication/login
U.S. Department of Labor
Bureau of Labor Statistics
If you have any questions,
contact:
The Bureau of Labor Statistics (BLS) has developed a Web Reporting Site (or Internet Data Collection Facility) to expedite online reporting, especially for respondents to multiple surveys or for multiple worksites. The Job Openings and Labor Turnover Survey (JOLTS) has made this useful tool available to JOLTS respondents.
Set Up User ID and Password
When you agree to report using this site, you will receive two emails from BLS for the JOLTS survey. One will include your Temporary User ID, and the other will include your Temporary Password.
Follow the link (https://idcf.bls.gov) in either email and enter your Temporary ID and Password.
Establish a new Password to activate your account.
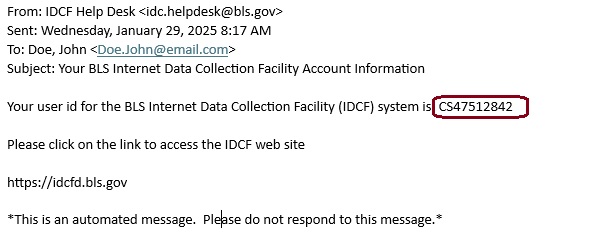
Save the subsequent confirmation email you receive containing your permanent User Id (Figuer 1.)
Figure 1. Confirmation Email with Permanent User ID
Navigate the BLS Web Reporting System
Once you have activated your account and established your permanent User ID and Password, you may report each month with the following link:
https://idcf.bls.gov/authentication/login
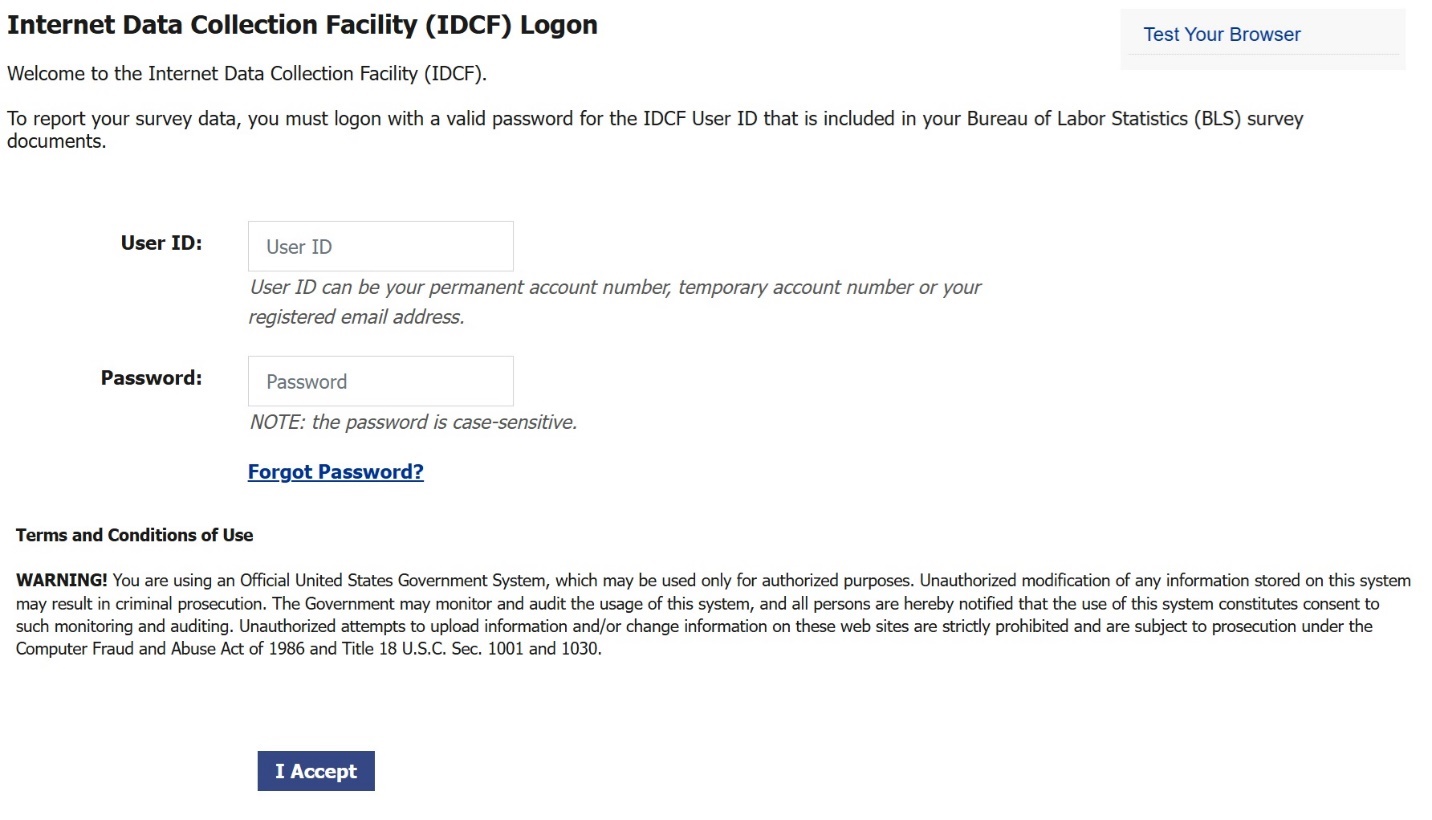
Step 1— Log on by using the permanent User ID and Password you have already established. You may also use your email if you forgot your User ID.
Figure 2. Logon Page
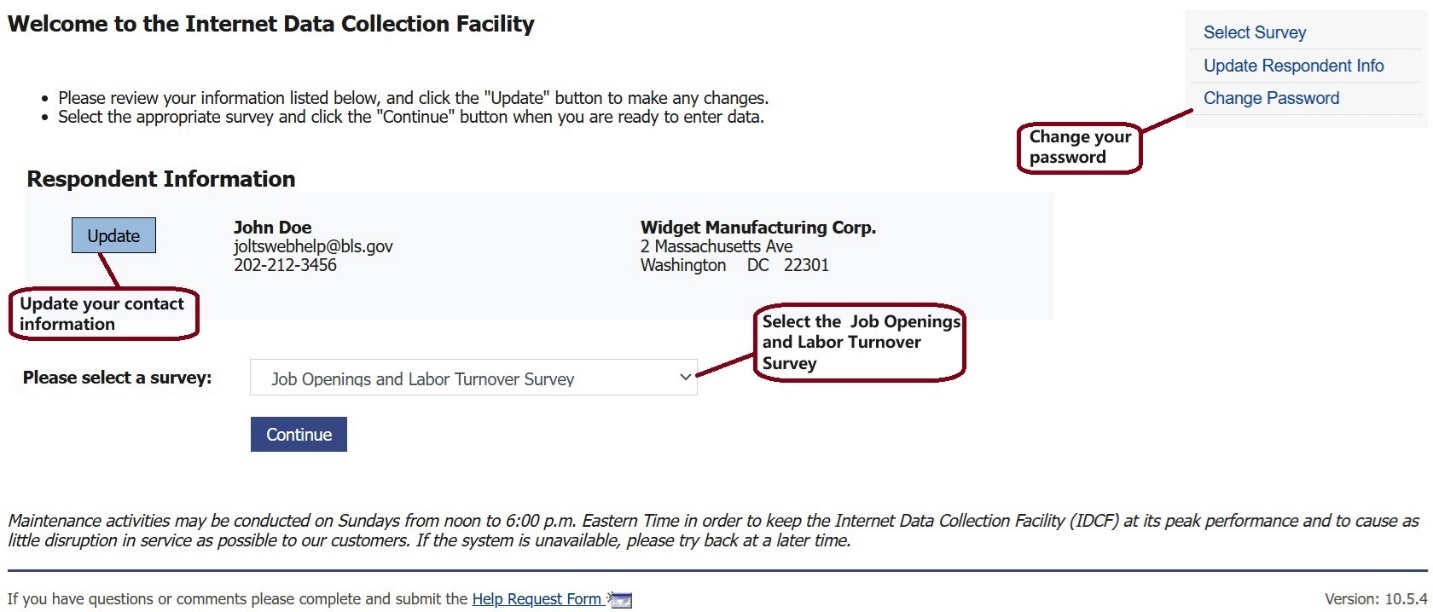
Step 2— Review your contact information, select the JOLTS survey, and select Continue. Here you can also:
Update your contact information
Request help by using the Help Request Form link at the bottom
Change your password
Figure 3. Welcome Page
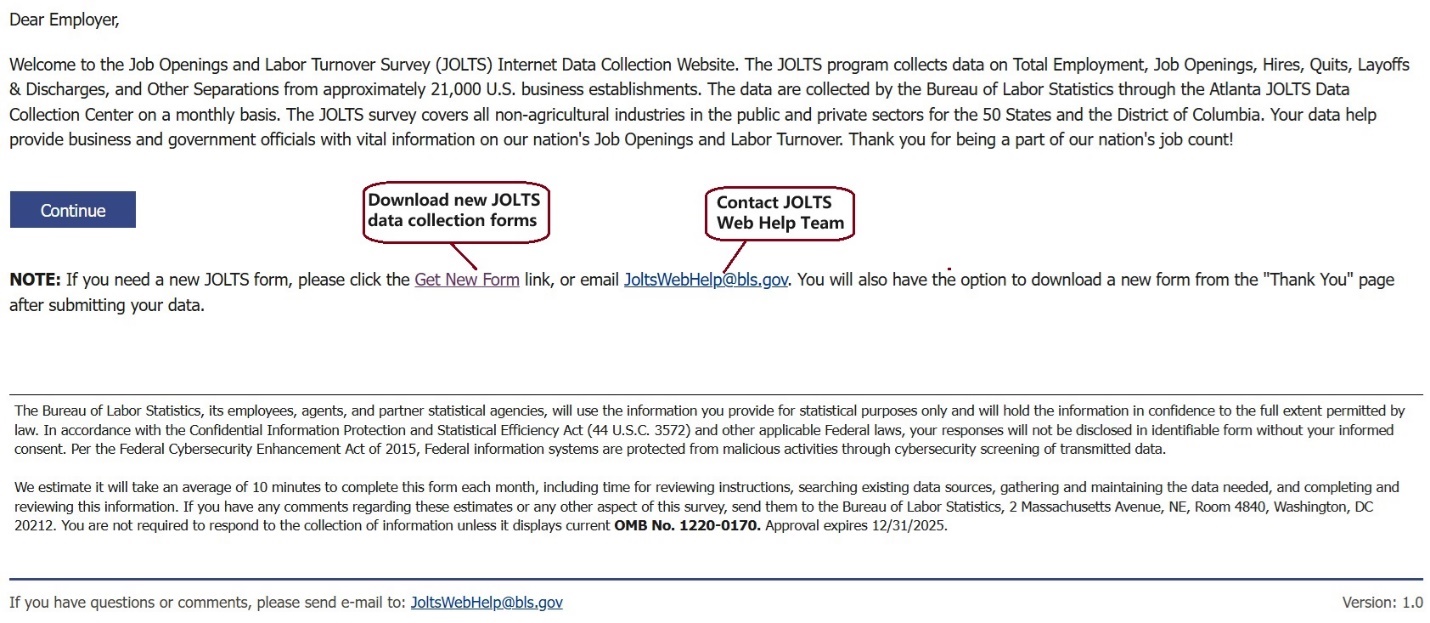
Step 3— Read the Welcome screen and press Continue. Here you can also:
Download new JOLTS forms
Contact the JOLTS Web Help Team directly for collection assistance
Figure 4. JOLTS Information Page
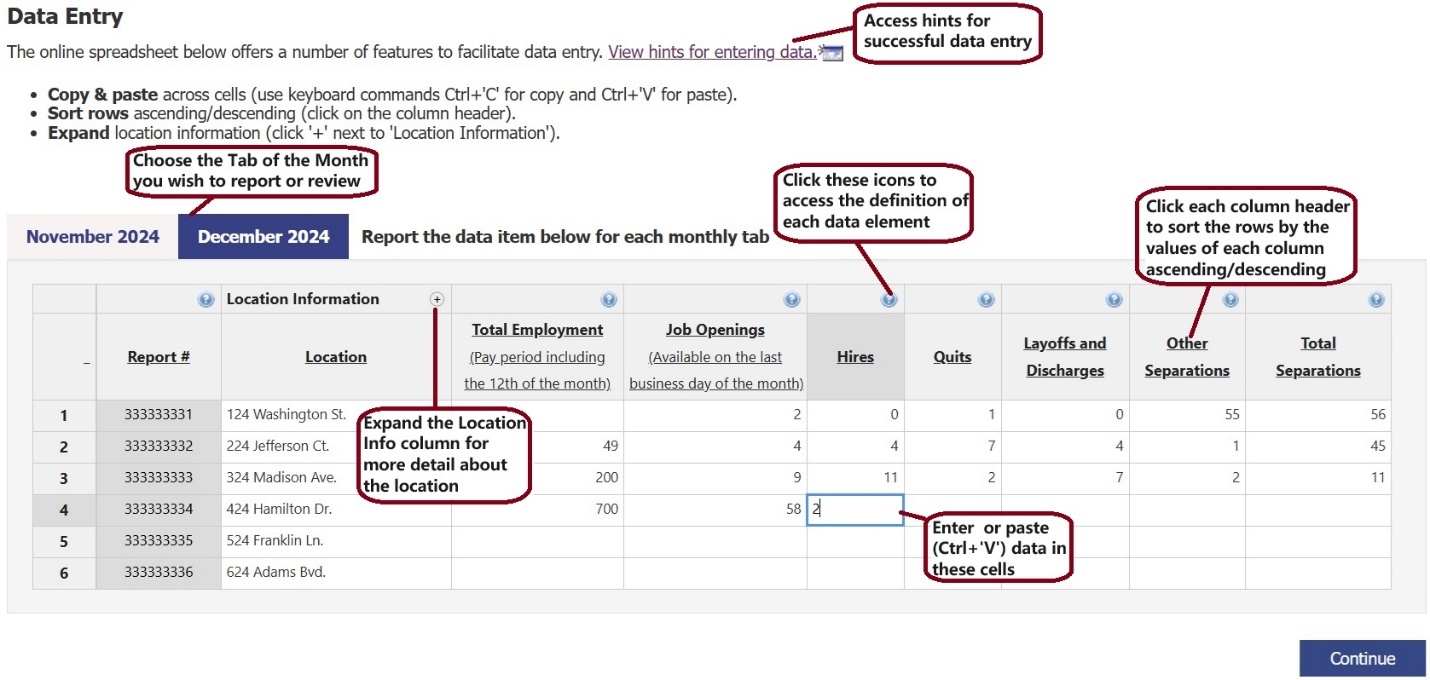
Provide data for all blank cells in the current month. To make it easier to enter data, you can:
Copy and paste data across cells from external records
Sort the data by clicking on the column header
Expand the Location Information columns by clicking on the
 button.
Provide or correct data from previous month(s) by selecting the tab for that month.
If you need help, you can:
Access definitions for each column by (hovering over/clicking on) the blue question mark icon in the column headers.
Figure 5. Data Collection Screen
Note! You may use the tab key to access all features on this page
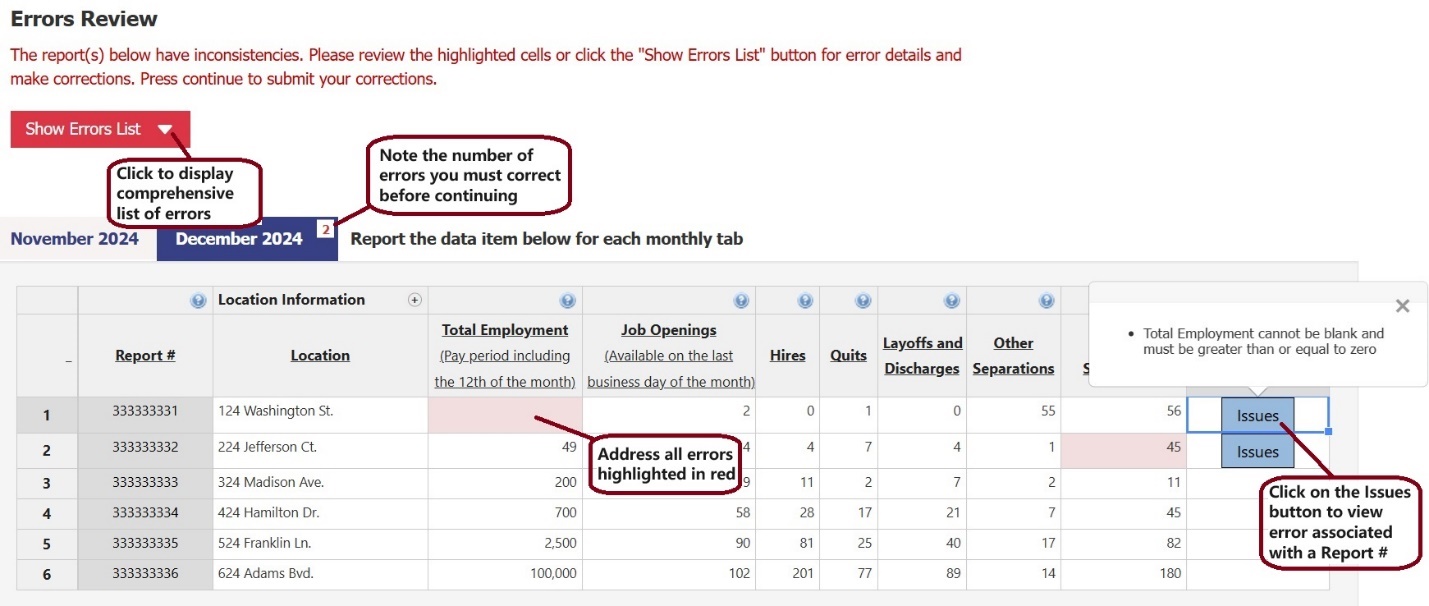
Step 5 — Review messages. The system reviews your data to identify potential problems. This step identifies inconsistent data that you must correct to move forward. To view the specific issues, press the “Show Errors List” or click on the “Issues” button associated with a report. Examples of possible problems include:
Non-numeric characters or negative numbers
No entry in Total Employment, which is a required field
Reports where Total Separations does not equal the sum of Quits, Layoffs and Discharges, and Other Separations when at least 2 of these fields are reported.
Figure 6. Error Review Page
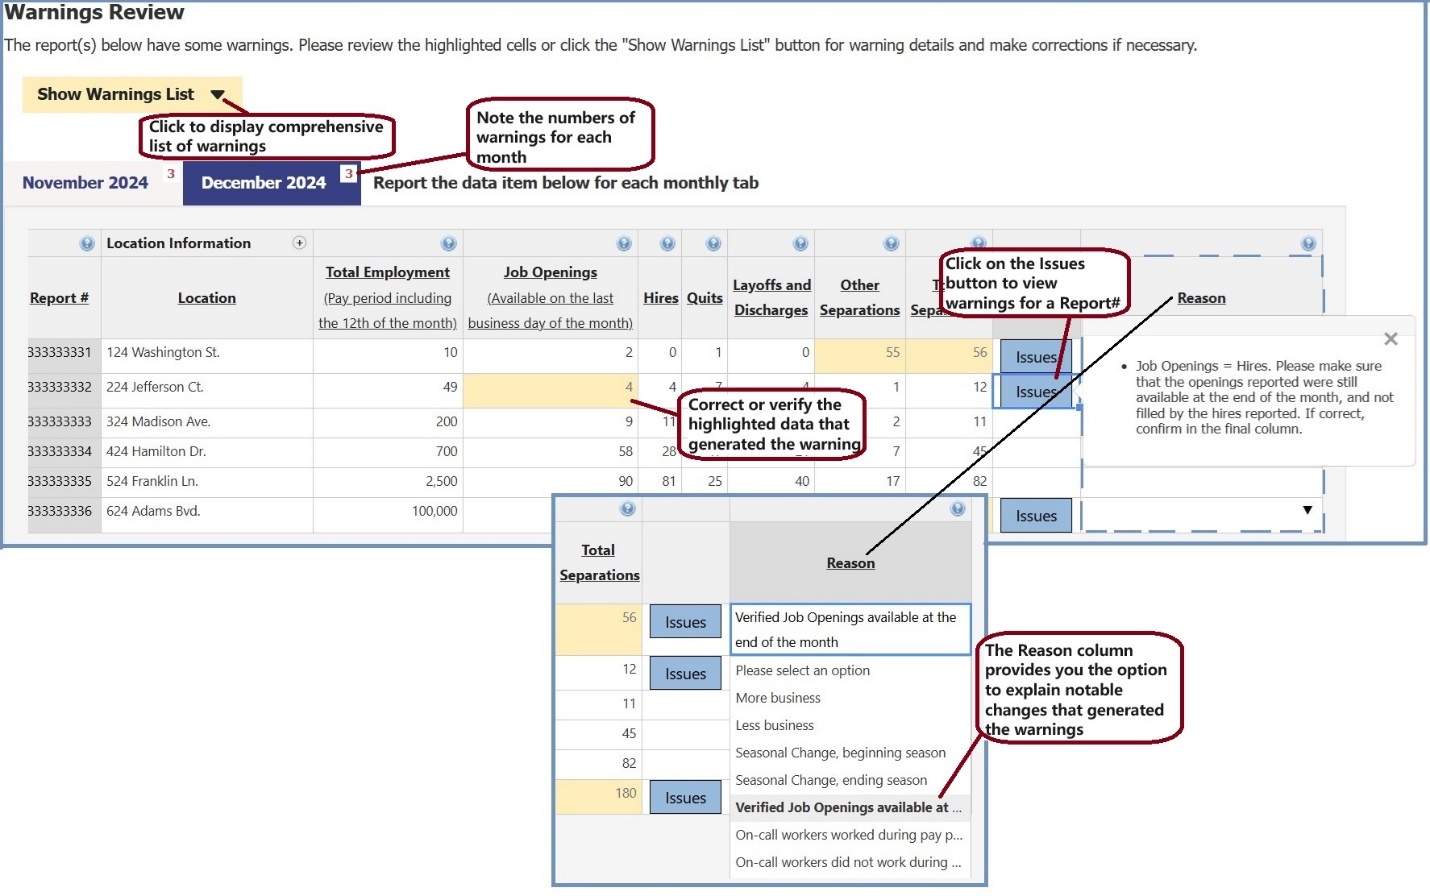
Step 6 — Address warnings regarding unexpected values.
The second review looks for unexpected values, such as unusually high or low data. If the values are correct, explain the situation in the “Reason” column. Your input here is not required, but it can help us better understand the changes and avoid excessive follow-ups to seek clarification.
Figure 7. Warnings Review Page
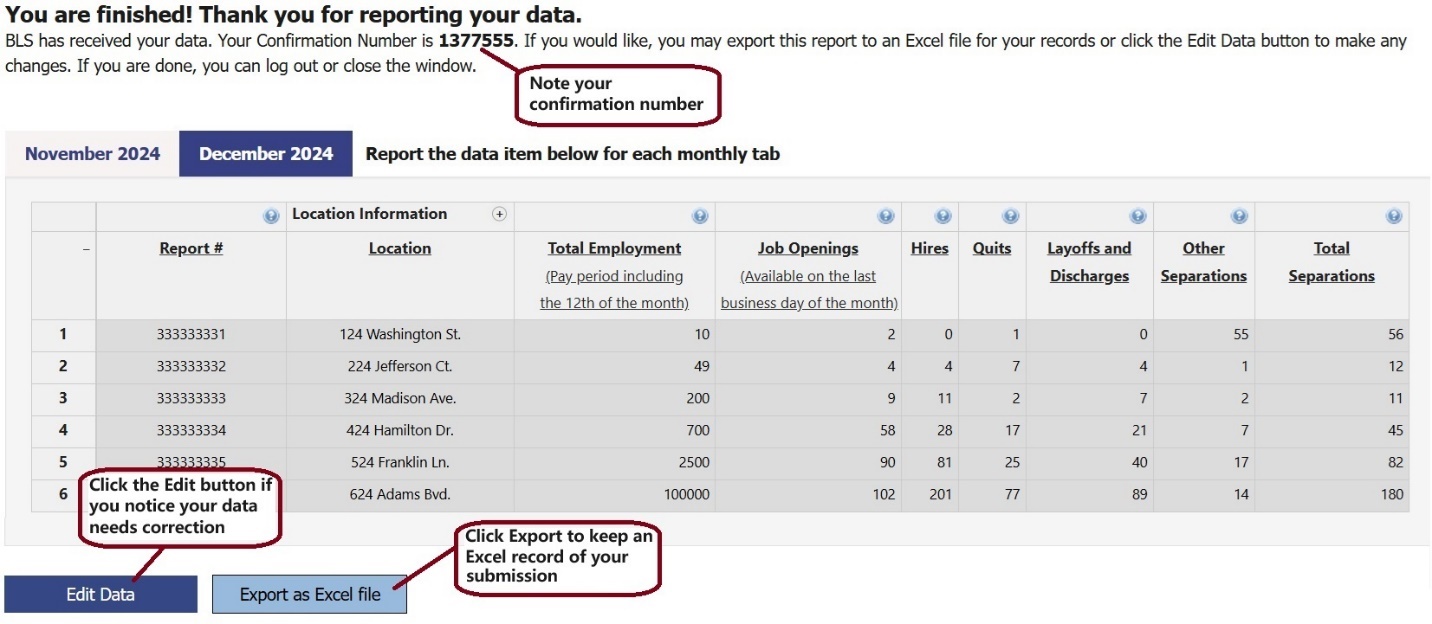
Step 7 —Review your data. The “Thank You” screen displays all your data and confirms that you have successfully submitted your data. On this screen, you can:
Export your data to Excel
Correct any problems by selecting the “Edit Data” button.
Figure 8. Thank You Page
| File Type | application/vnd.openxmlformats-officedocument.wordprocessingml.document |
| Author | Ibrahim, Jean - BLS |
| File Modified | 0000-00-00 |
| File Created | 2025-02-05 |
© 2026 OMB.report | Privacy Policy