Automated Installation Entry (AIE) System
Automated Installation Entry (AIE) System
Extract from_FPS_AIE_INCR2_A021_TECH_MAN_PT2_VISITOR REG UPDATED_25NOV13
Automated Installation Entry (AIE) System
OMB: 0702-0125
VISITOR
ENROLLMENT
To enroll a visitor, perform the following steps:
From the EntryPoint Home screen, scan a Driver's License or State Issued ID using the Barcode Scanner.
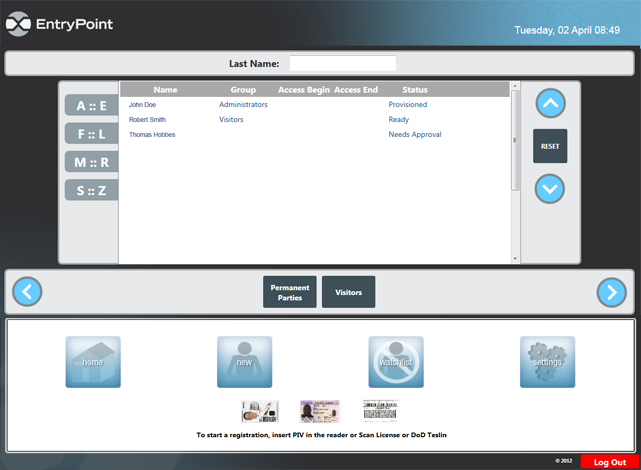
Figure 63. EntryPoint Home Screen.
On the USB keypad, have the enrollee enter a 4 digit Site PIN, and then select a Deny at FPCON Level.
 Figure
64.
Required
Information Screen.
A Banned List check will run. If passed, click Continue. If failed, stop enrollment.
NOTE
If the Enrollee is not the individual referenced on the Banned List Match screen click the Override button to continue enrollment.
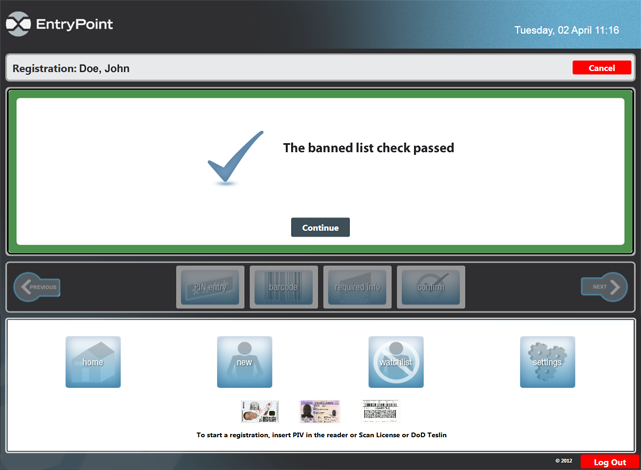
Figure
65.
Banned
List Passed Screen.
The Enrollee Information screen appears. Confirm personal address, Blacklist result, and required Information fields are correct. Edit if needed
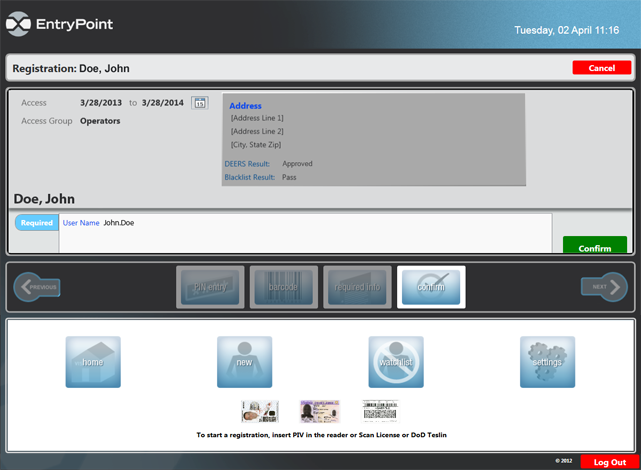
Figure 66. Enrollee Information Screen.
Click Confirm Registration button.
A screen indicating that the enrollee has been provisioned appears. View the Visitor Group list to confirm Provisioning. The EntryPoint section of Visitor enrollment is finished. Press Alt+Tab to switch to AMAG Symmetry.
In AMAG Symmetry:
Click the Visitor icon. The Visitor window appears.
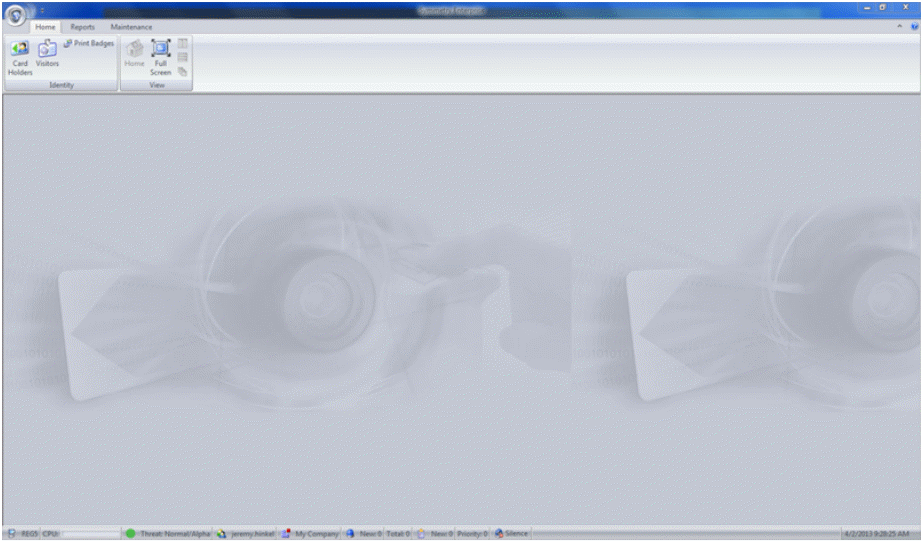
Figure 67. AMAG Home Screen.
In the Visitor Last Name field, enter the visitor's last name and click the Magnifying Glass icon or the Find button.
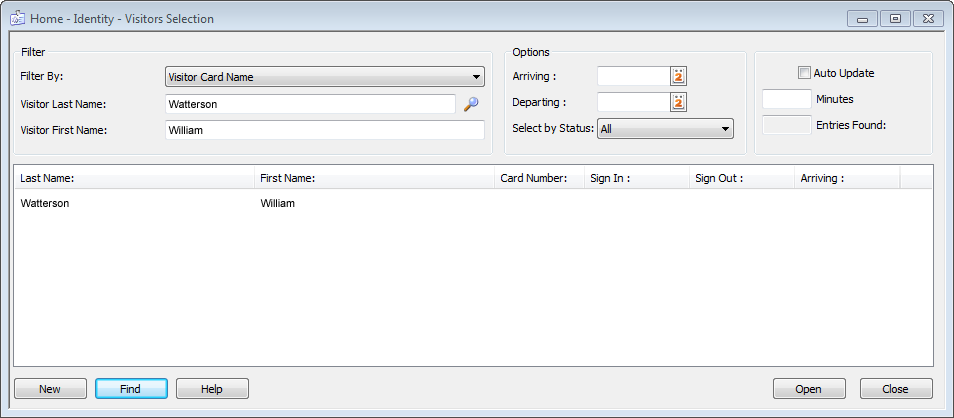
Figure 68. Visitor Window.
NOTE
Click Find without entering any search criteria, and AIE Increment 2 System will display all enrolled visitors. Enter in a letter with an asterisk (example: a*) and all names starting with that letter will be displayed.
Double-click on the correct name.
In the Visitor Definition dialog, click on the Personal tab:
Verify the following:
Trusted Traveler status is NO
Blacklist Check Field status is PASS
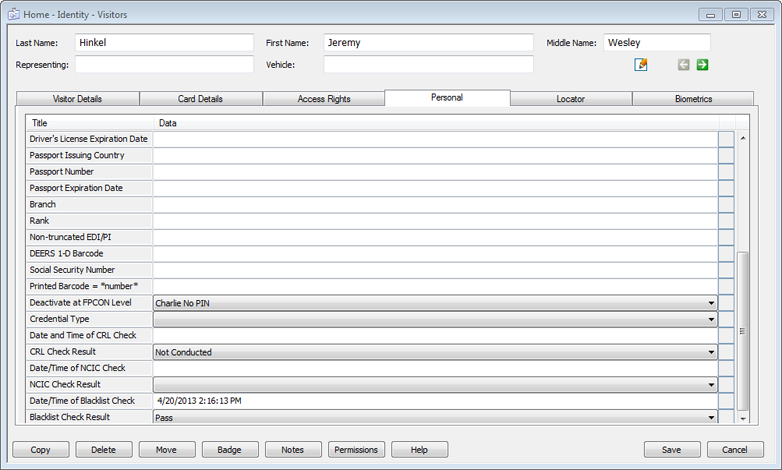
Figure 69. Personal Tab.
Click the Card Details tab:
Verify that the data is correct or enter the following data:
Active/Inactive Date.
Enter a 1 in the Agency Code Field (this is required to proceed with enrollment)
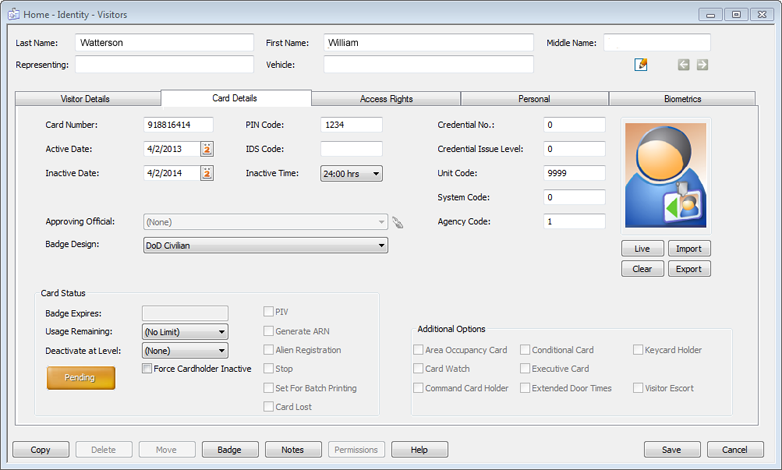
Figure 70. Card Details Tab.
Click the Visitor Details tab:
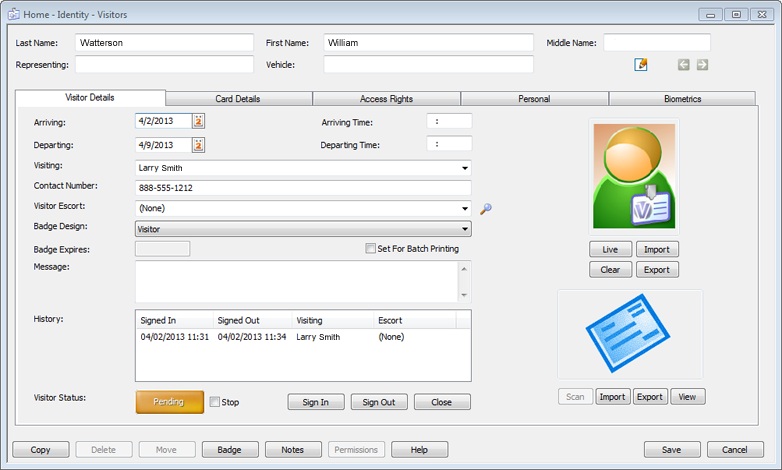
Figure 71. Visitor Details Tab.
Click the Live button to record a photographic image of the visitor.
NOTE
Follow the instructions as defined in the Cardholder Enrollment section for the AMAG Symmetry Software when taking a live image of visitors.
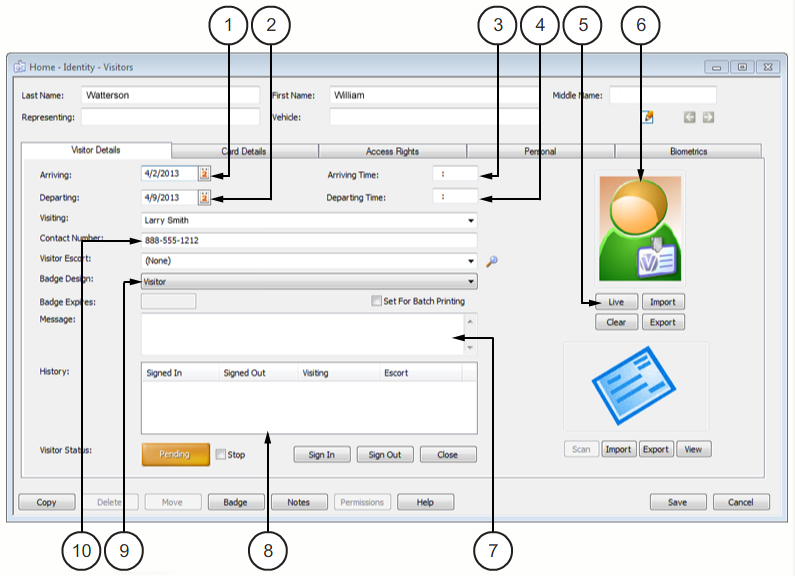
Figure 72. Visitor Details Tab.
Table 9. Visitor Details Tab.
KEY |
|
ITEM |
DESCRIPTIONN |
1 |
ARRIVING |
Verify the start date of the requested visit. |
|
2 |
DEPARTING |
Verify the leave date of the requested visit. |
|
3 |
ARRIVING TIME |
Verify the start time of the requested visit. |
|
4 |
DEPARTING TIME |
Verify the leave time of the requested visit. |
|
5 |
LIVE |
Opens a window containing a live image from a connected video camera. In the new window, click Freeze to capture the image. Click Resume to return to viewing live video and capture a better image. |
|
6 |
FACE IMAGE |
This is the picture of the visitor taken by Registrar. |
|
7 |
MESSAGE |
Enter reason for visit request here. |
|
8 |
HISTORY |
Shows recent gate access requests. |
|
9 |
BADGE DESIGN |
Select the visitor option for badge printout and enterprise wide AIE Increment 2 access. |
|
10 |
CONTACT NUMBER |
Enter primary phone number here. |
|
Enter any additional information required per site SOP.
Click the Sign In button to make the entry active in the system.
Select Badge Design from Badge Design drop down menu:
Visitor: Prints a paper pass for short term visitors to the site
Visitor Badge: Prints a pass on a badge for long term visitors to the site (up to one year from date of enrollment)
To print a Visitor Pass or Badge, click the Badge button to preview the pass or badge.
NOTE
The Badge Design will determine the printed format and appropriate printer needed (laser printer for paper pass and badge printer for physical card).

Figure 73. Badge Printing Screen.
Verify the information is correct; click Print, then click Save and close the window.

NOTE
Pass and badge contains PII information. Promptly retrieve passes and badges after printing and properly dispose of any unused passes or badges.
The visitor will take the temporary visitor pass/badge printout with them for scanning at vehicle lanes for base access.
NOTE
The Gate House Operator will have to use the DAP Handheld Scanner located at the Gate House to scan in visitor pass printouts. Printed visitor card badges will work at both vehicle and pedestrian lanes.

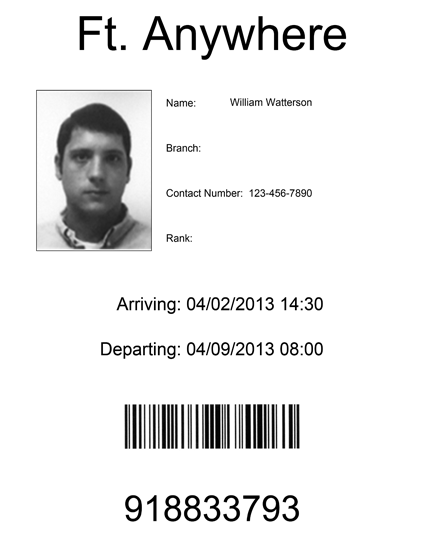
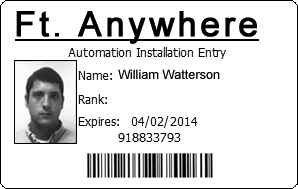
Figure 74. Visitor Pass and Badge Printout Examples.
Click Save on the Visitor Definition dialog to complete enrollment and close the windows.
WARNING:
EXPORT
CONTROLLED
DATA/
FOR
OFFICIAL
USE
ONLY
0017-
| File Type | application/msword |
| Author | Lott, David B. CTR USA |
| Last Modified By | United States Army |
| File Modified | 2013-11-25 |
| File Created | 2013-11-25 |
© 2026 OMB.report | Privacy Policy