Assessing Early Childhood Teachers' Use of Child Progress Monitoring to Individualize Teaching Practices
Pre-testing of Evaluation Surveys
ATTACHMENT I_video_instruction_0902
Assessing Early Childhood Teachers' Use of Child Progress Monitoring to Individualize Teaching Practices
OMB: 0970-0355
ATTACHMENT
I
EDIT video equipment instructions
Steps for Video Recording
 S
S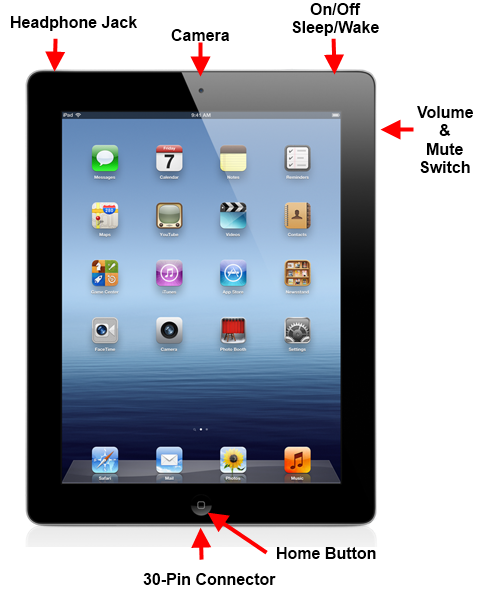
tep
1. Get to know your iPad and its accessories. In addition to (1)
an iPad mini, you are provided with (2) an iPad case, (3) stand
(arrives in two pieces), (4) charger, and (5) charger case. Below is
a diagram that shows a layout of some of the iPad’s main
functions that will be useful to you while using it.
Be sure to store the iPad and all accessories in a secure place until an EDIT team member visits your center.
Charging your iPad. Please
only use the charger provided to you as other chargers may harm the
device. T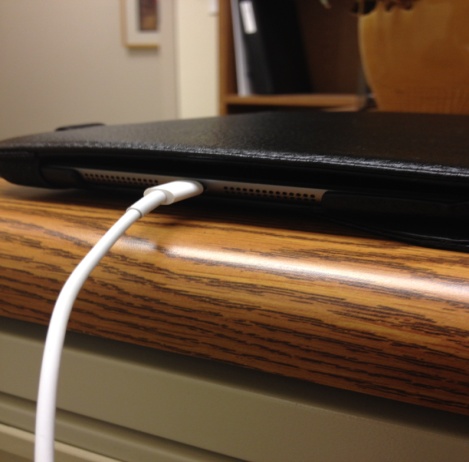
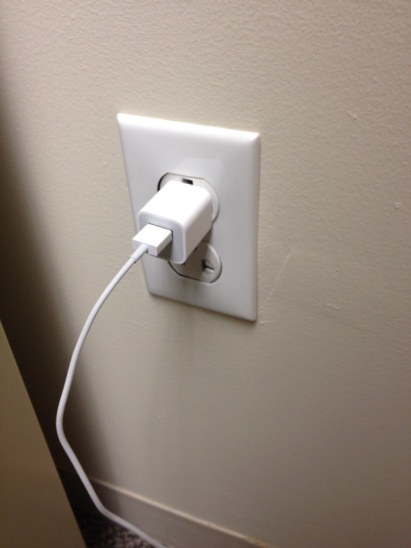
he
smaller end of the charger should be inserted into the charging port
below the home button on the iPad. Then, plug the other end into a
wall outlet.
Turning Your Device On and Off. To turn on your device when it is completely shut down, press and hold down the power button on the top of the iPad until the screen lights up displaying the Apple logo.

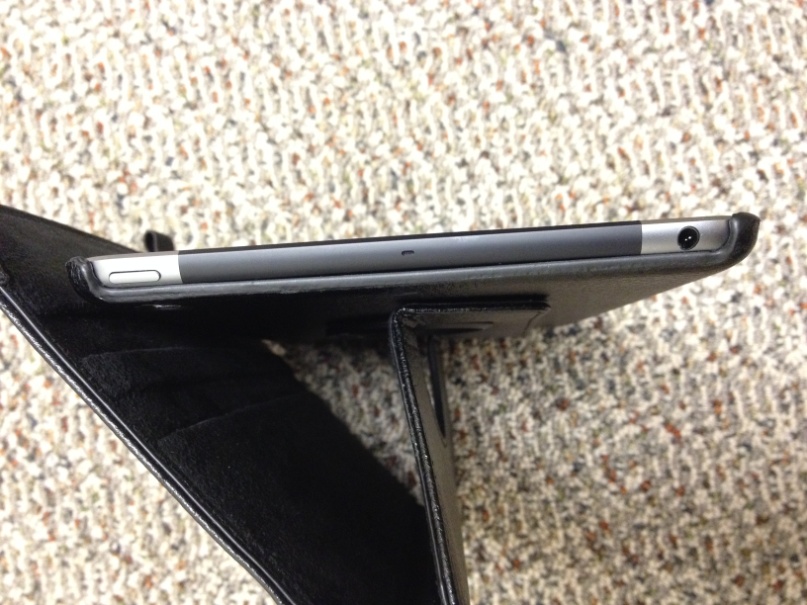
To unlock your iPad, place your finger over the “slide to unlock” prompt on the iPad screen and gently swipe to the right across the screen. This will bring you to the iPad’s home menu screen. Anytime the screen display turns off, you will need to unlock the screen.

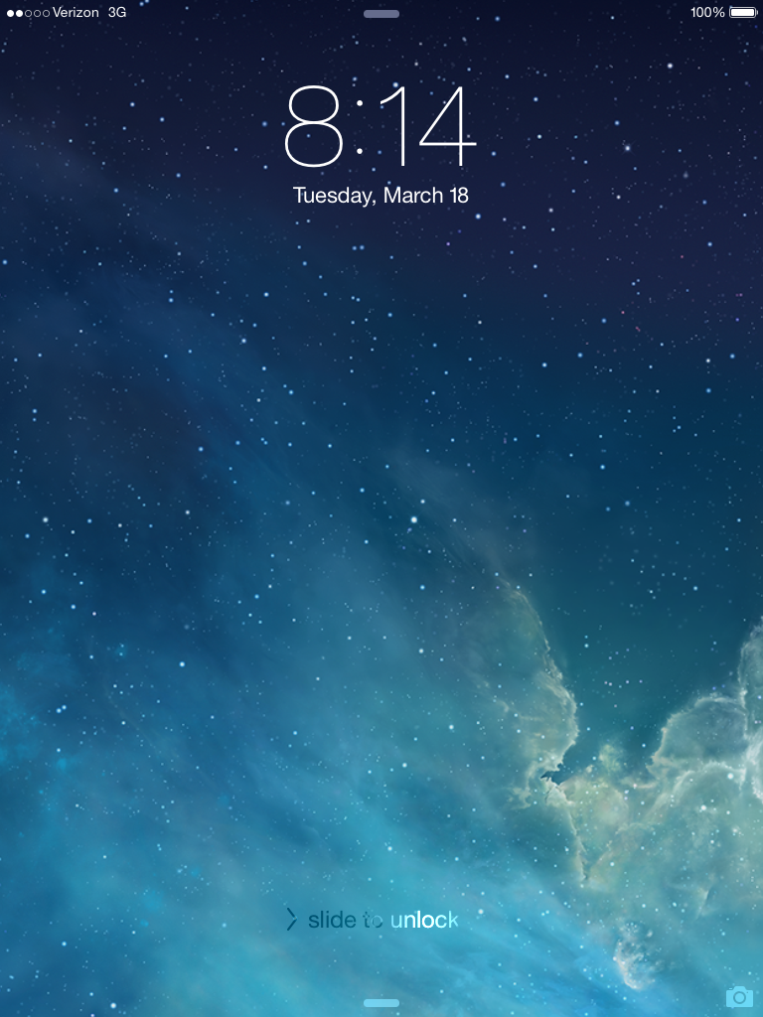
To shut off the iPad completely, press and hold the power button until the screen changes to the power off screen. This screen will show the option to power off the iPad by sliding the power symbol to the right using your finger as well as a “cancel” option to return to the previous screen.
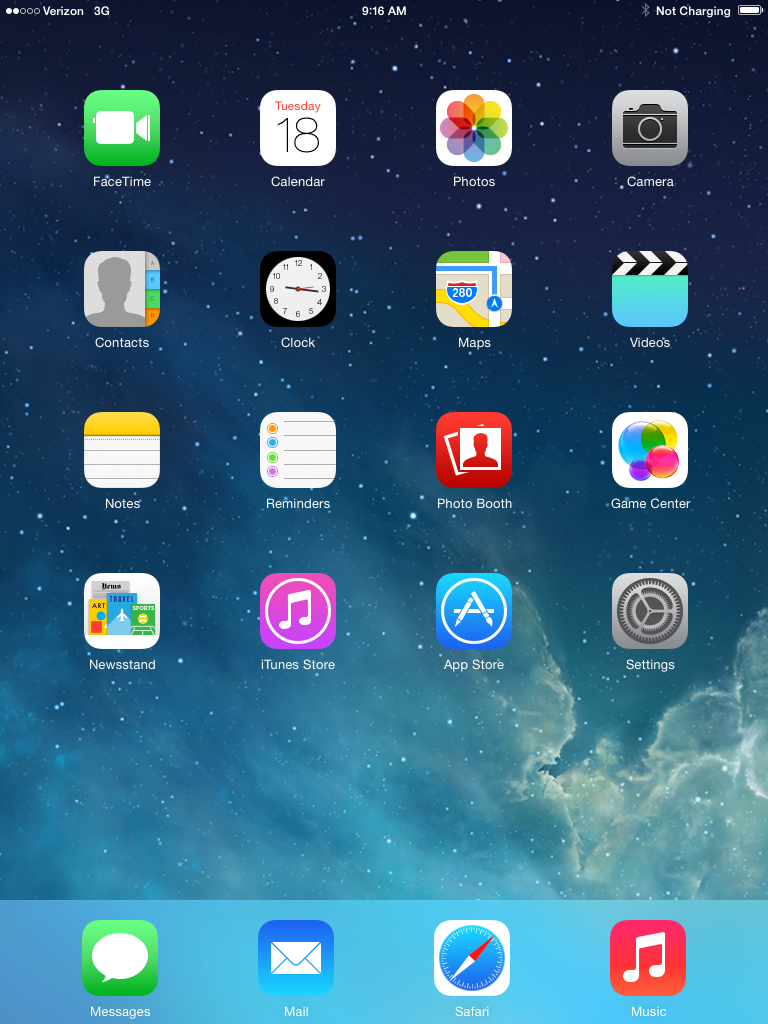
Navigating the Home Screen. When your device is turned on and unlocked it will take you to the home screen. The home screen displays icons, the time, and the charging status. The only two icons you will need to work with are the Photos and Camera icons. It is important to note, pressing the home button will always take you back to the home menu screen.


Step 2: Put the stand together.
The iPad stand has two parts to it; the base and the piece that
holds the iPad in place on the stand. To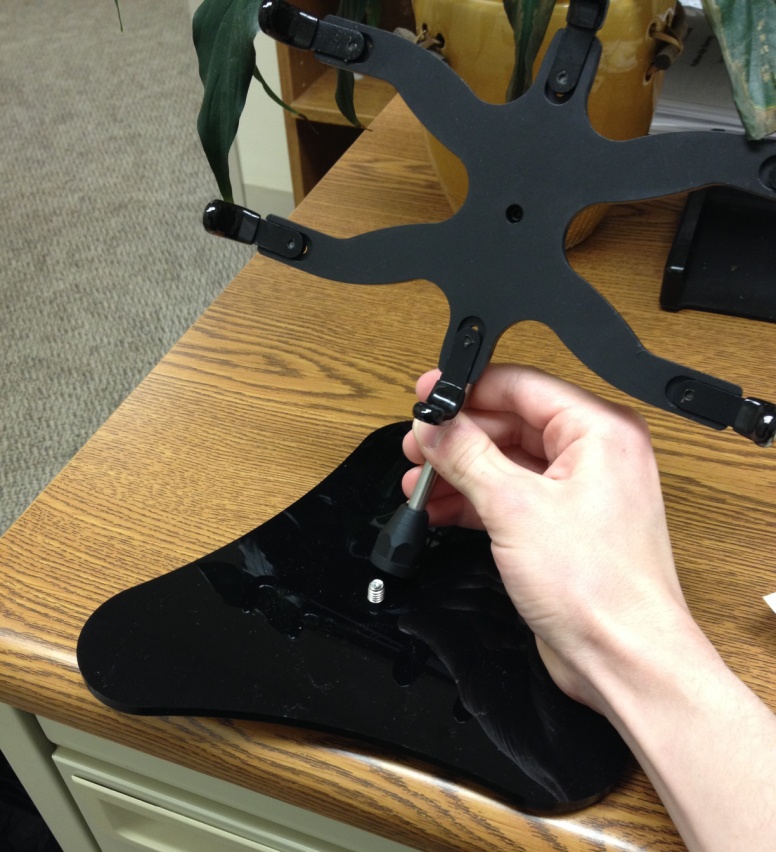
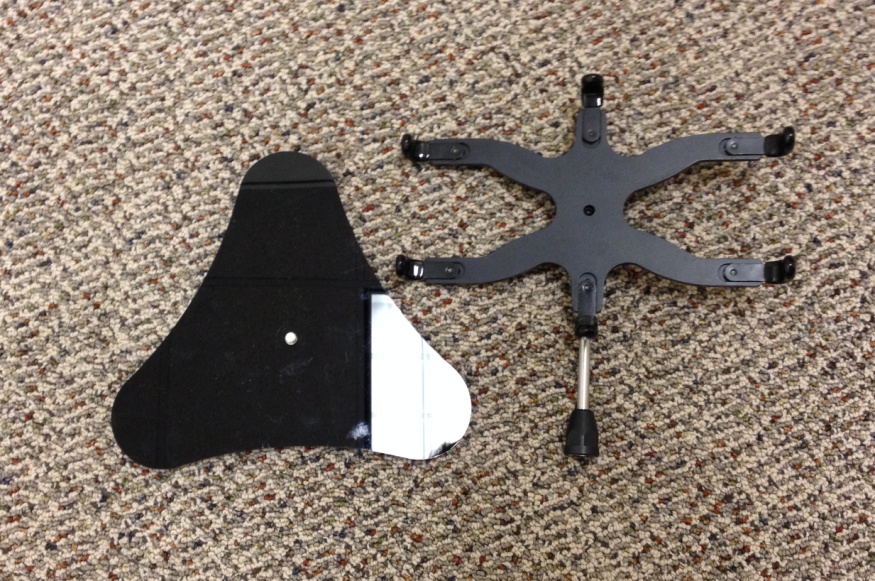 assemble the stand, screw the base into the other piece as seen
below. Turn clockwise until the base and other piece are firmly
screwed in and the stand does not wobble.
Step 3. Remove the iPad from its case. Take the iPad out of its case by pulling back the top right corner of the case against the iPad. Work your way around the iPad slowly pulling it away from the case until it comes out. A little bit of force may be needed to completely remove the iPad from the case.
Step 4. Place the iPad into the stand horizontally. It should fit snug within the six grips on the stand that keep it in place. Please note that you will not be able to fit the iPad in the stand while it is in its case.
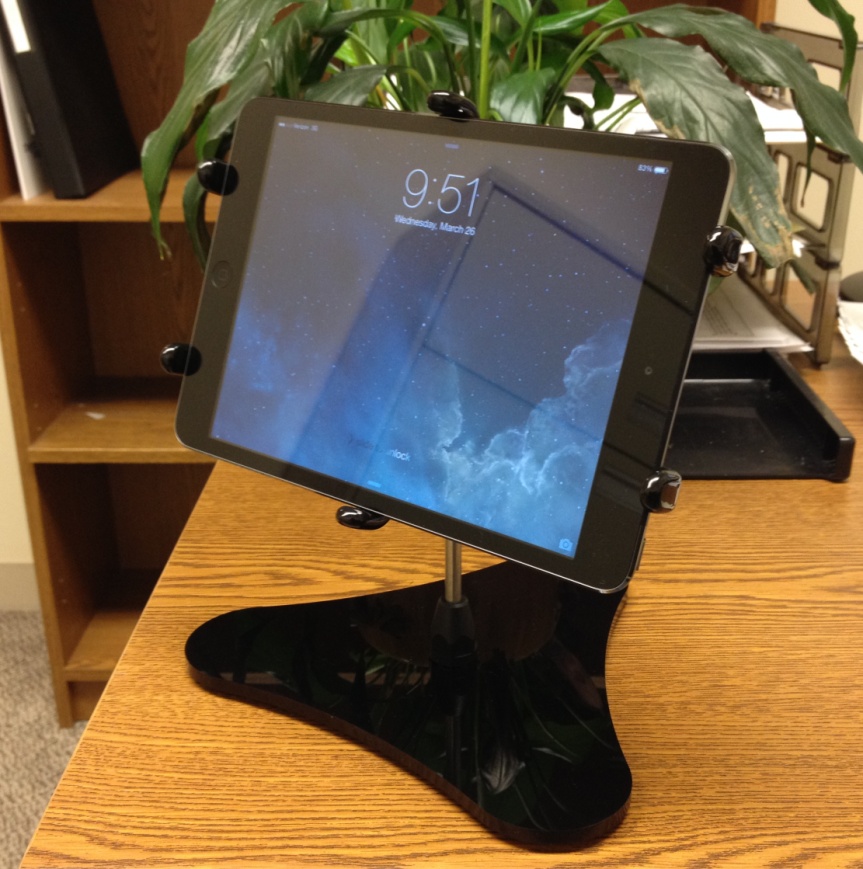
Step 5. Open the video camera by selecting the Camera icon. This will automatically bring up the camera mode on the iPad. It is important to note that at this time your iPad is NOT yet set up for video recording.
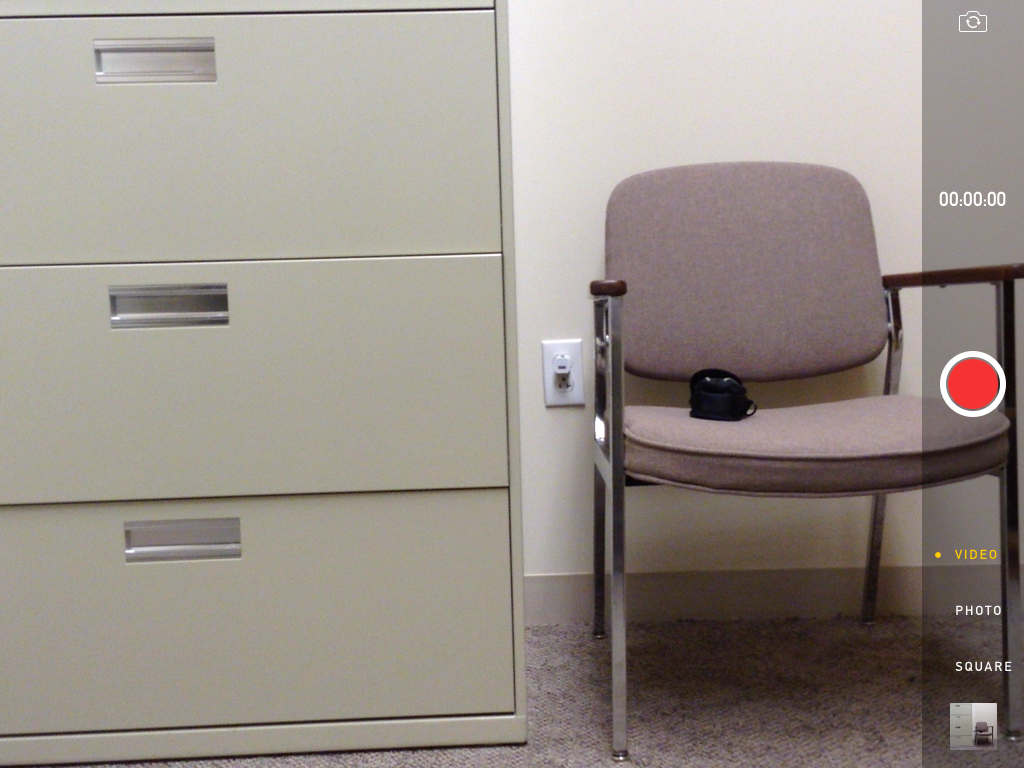
Step 6. Change to video mode. To set up your iPad for video recording, swipe down with your finger on the screen near the Video option to change the recording format. When you have switched to Video recording mode, the layout of the screen should change showing a timer and a red record button. Now you are in video recording mode.

 Step
7. Switch camera view to self-view. It is very
important that the camera view is switched to “self view.”
Self view will allow you to position the iPad so the screen is facing
you and your audience so you can see exactly what the iPad is
recording on the screen. To switch to self view press the little
camera icon in the top right corner and that will switch the camera
to the front of the iPad.

Step 8. Position the iPad so that you can see you and the consented child(ren) in the activity. If it is impossible for the camera to see all of the children, please be sure that the camera focuses on you and the focal child.
Step 9. Begin recording. Tap the record button. Please do not stop recording until your entire lesson is over. When you tap the record button, you will see the timer above it begin to indicate how long the current recording session is going on for.


Step 10. Stop recording. When your activity is over, tap the record button once again to stop recording. When you stop a recording it will automatically be saved to the iPad.
Step 11. Confirm that your recording saved to the iPad. To view the video you have just recorded go to the home menu screen. From there, tap the Photos icon. This will take you to where your videos will be stored. To play back a video, tap on it to bring it up and then tap the play button in the center of the screen.
Step 12. End of Recording Session. When your recording session is over and you confirm that the recording saved to the iPad, turn off the iPad completely and remove it from the stand. Place the iPad back in its case. It should align properly with the buttons on the sides of the iPad and the back camera lens. Note that the volume buttons and power buttons should not be obscured at all by the case.
| File Type | application/vnd.openxmlformats-officedocument.wordprocessingml.document |
| Author | TLuyster |
| File Modified | 0000-00-00 |
| File Created | 2021-01-25 |
© 2026 OMB.report | Privacy Policy